
Last 10 Years: Paint a Shipping Container for Corrosion Control

Yes: paint a shipping container when you treat it as a corrosion-control system, not a cosmetic touch-up. That means prep, primer, and topcoat working together, in that order, on properly cleaned steel. Conexwest has delivered more than 30,000 containers across 48 states, and the finish that survives a decade in salt air always follows this same sequence. Skip a step, and even premium paint fails early.
TL;DR:
- Proper surface inspection and preparation are critical, especially for heavily corroded areas, to ensure long-lasting paint adhesion and prevent early failure.
- Using epoxy or zinc-rich primers in high-exposure environments and applying multiple thin topcoats over a well-prepped surface significantly enhances corrosion resistance and longevity.
- Neglecting rust removal, ignoring dew point conditions during application, or applying heavy coats can cause blistering, peeling, or early deterioration of the coating.
- Factory-direct, pre-prepped containers from suppliers like Conexwest can save time and reduce risks, especially for those seeking a reliable, durable finish without extensive on-site prep.
- Waterborne primers and topcoats now provide comparable corrosion protection to solvent-based systems, offer lower VOCs, and simplify application, especially in enclosed yards or areas with air-quality restrictions.
Table of Contents
- How Do You Inspect a Container Before Painting It?
- Which Primers and Topcoats Actually Hold Up?
- Step-by-Step Surface Prep for a Container Repaint
- How Do You Apply Primer and Topcoat for a Lasting Finish?
- How Much Paint and Money Does the Job Take?
- How Often Should You Inspect and Touch Up a Painted Container?
- Conexwest: Where Prepped Containers Fit Into This Process
- Are There Eco-Friendly Paint Options for Containers?
- What Mistakes Ruin a Container Paint Job?
- Why Longevity Should Drive Every Decision Here
- Get a Container Ready to Paint, or Skip the Prep Entirely
- Sources
- FAQ
How Do You Inspect a Container Before Painting It?
A proper inspection tells you whether you’re facing a weekend project or a structural repair. Walk the entire container slowly, checking the roof first since it takes the most UV and rain exposure, then move to the seams, corner castings, welds, door hinges, and the bottom rail where road salt and standing water do the most damage.
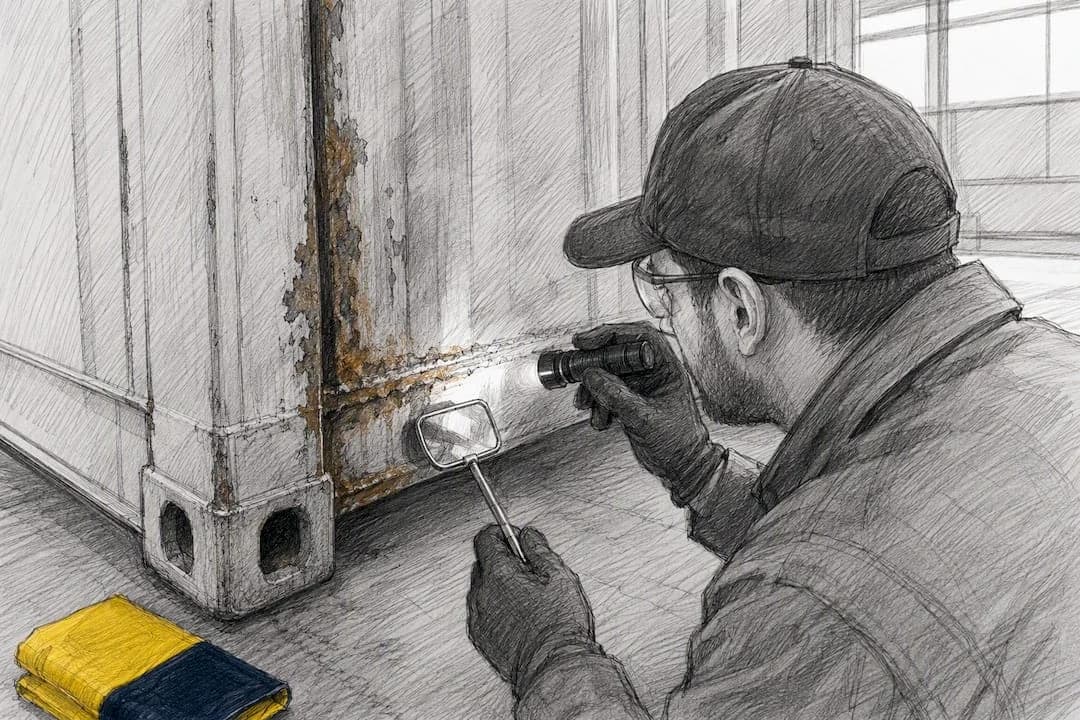
Surface rust looks powdery, orange, and shallow. It wipes off with a wire brush or 80 to 120 grit sanding and doesn’t compromise the steel underneath. Deep corrosion is different: it pits the metal, flakes in chunks, or leaves the panel feeling soft or thin when you tap it. That level of damage usually needs welding or a panel replacement before any paint goes on, because painting over compromised steel just hides a problem that will reappear within a season.
Before you touch a pressure washer, scope your containment and disposal plan:
- Check local runoff rules; pressure-washing old paint can release lead or chromate residue depending on the container’s age and origin
- Lay tarps or containment mats under work areas to catch paint chips and rust dust
- Note every hinge, vent, and lockbox that needs masking or removal before washing
- Photograph problem areas now so you can track whether repairs hold after the first wash
Pro Tip: Tap suspect panels with a rubber mallet before you commit to a paint plan. A dull, solid thud means the steel is sound; a hollow or crunchy sound means you’re looking at a repair job, not a paint job.
Which Primers and Topcoats Actually Hold Up?
Primer choice depends entirely on where the container will sit, not on what looks good on the shelf. Coastal sites, industrial yards, and anywhere road salt collects call for epoxy or zinc-rich primers, which bond aggressively to bare steel and resist the sand-through corrosion that plagues cheaper coatings. Inland storage yards and lower-exposure jobs can often get away with a direct-to-metal (DTM) waterborne primer, which costs less and cures faster.
Topcoat selection follows the same exposure logic:
- Polyurethane topcoats resist UV fade and chalking best, which matters most on roofs and south-facing walls
- Acrylic or alkyd topcoats cost less and need less ventilation, a reasonable trade for budget projects or indoor-adjacent units
- Marine-grade systems handle direct salt spray and are worth the premium for dockside or coastal fleet containers
Waterborne DTM formulations have closed much of the performance gap with solvent-based paint. Modern waterborne coatings can meet ISO 12944 corrosion classes C3 through C5 while running lower VOCs and curing faster, a genuinely useful shift for anyone painting in an enclosed yard or under tightening air-quality rules.
Before buying anything, pull the product data sheet (PDS) for both primer and topcoat. The PDS tells you recoat windows, compatibility between coats, and whether the two products you picked will actually bond, since mixing an epoxy primer with the wrong topcoat chemistry can cause peeling within months.
Step-by-Step Surface Prep for a Container Repaint
Surface prep determines whether your paint job lasts three years or fifteen. Skipping steps here is the single most common way DIY container jobs fail early.
- Pressure-wash the entire container at 2,000 to 3,000 psi with a mild detergent to strip loose dirt, chalking paint, and surface salt, working top to bottom so runoff doesn’t recontaminate cleaned sections.
- Let it dry fully, ideally overnight, since trapped moisture under new paint is a fast track to fresh rust.
- Mechanically prep every surface, using 80 to 120 grit sanding discs on flat panels and a wire wheel or wire brush for corners, seams, and weld lines. Grit blasting is worth renting for heavily corroded units or full commercial refurbishments.
- Treat tightly adhered rust with a rust converter, but only where the rust can’t be fully removed by sanding; converters work by chemically stabilizing what’s left, not by replacing mechanical prep.
- Cut out and weld-patch severely corroded panels before priming; paint has no structural role and can’t bridge a hole.
- Mask hardware, vents, and data plates, reseal any door and roof seams that show gaps, and remove old decals or stickers that would otherwise telegraph through the new finish.
- Bag and dispose of paint chips and sanding dust properly, especially on older containers that may carry lead-based coatings from earlier repaints.
Pro Tip: Steel temperature matters more than most DIYers realize. Applying primer when the metal sits within a few degrees of the dew point traps moisture under the film and causes blistering weeks later, even if the paint looked perfect going on.
How Do You Apply Primer and Topcoat for a Lasting Finish?
Work in a consistent sequence: roof first, then upper walls, lower walls, and doors last. This order keeps drips and overspray off sections you’ve already finished and lets gravity work in your favor rather than against you.
- Maintain a wet edge on every pass so lap marks don’t show once the paint cures
- Apply epoxy primer at the film thickness listed on the PDS, since underapplying it undercuts the corrosion resistance you paid for
- Plan for 2 to 3 thin topcoats rather than one heavy coat; thin coats cure evenly and resist sagging on vertical panels
- Choose your application method based on the job: sprayers give the most even film on large flat areas but need containment to control overspray, rollers work well for walls with fewer edges, and brushes are best reserved for corners, seams, and touch-up work
Cure times vary by system, but a workable rule holds across most epoxy and urethane products: light handling is safe after 24 hours, and the container can be moved after about 48 hours. Full chemical cure, the point where the coating reaches its rated hardness and chemical resistance, can take seven days or longer. Rushing a container back into service before that window closes is a common way to scuff a brand-new finish.
How Much Paint and Money Does the Job Take?
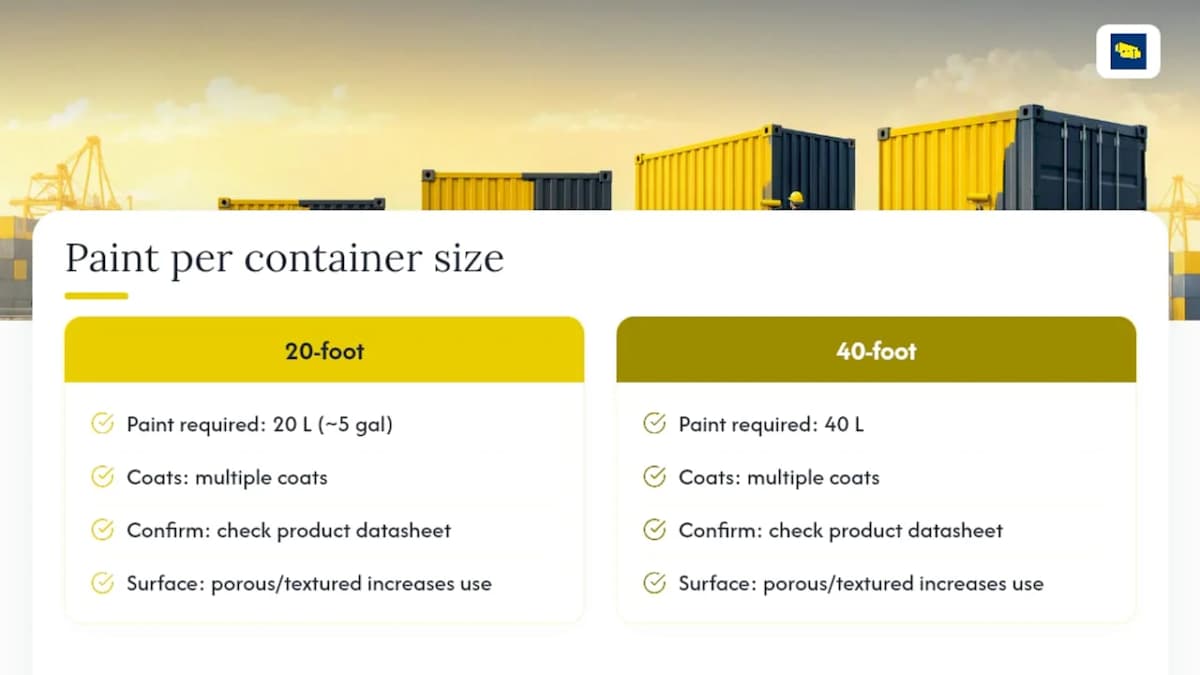
Coverage planning starts with container size. A 20-foot container typically needs about 20 liters, roughly 5 gallons total, across multiple coats, while a 40-foot unit runs close to double that at around 40 liters. Treat these as planning estimates and confirm exact coverage rates against your chosen product’s data sheet, since porous or heavily textured surfaces drink up more paint per coat.
Cost swings widely based on prep and system quality. Per-square-foot paint system costs generally vary by the quality of materials and preparation, with budget systems costing less and premium marine-grade epoxy systems costing more, depending on whether you’re using budget acrylic or a marine-grade epoxy system.
Labor and equipment rental (pressure washers, sprayers, sanding discs) often account for more of the total than the paint itself, especially on containers with heavy surface corrosion.
How Often Should You Inspect and Touch Up a Painted Container?
Set a rhythm and stick to it: a full visual inspection once a year, and every 3 to 6 months if the container sits in salt air or a coastal yard. Look specifically for paint bubbles, chipped edges around doors and forklift pockets, and thin rust streaks bleeding from seams or bolt heads.
- Catch bubbling or chalking early and it’s a spot repair; catch it late and you’re repainting a whole panel
- Spot-repair sequence: clean the area, sand to feather the edges into sound paint, spot-prime the bare metal, then topcoat to match
- Escalate to panel repair or replacement once rust has pitted through more than surface depth
- A container needing spot repair on more than 30 to 40% of its surface is usually cheaper to fully repaint than patch piecemeal
Conexwest: Where Prepped Containers Fit Into This Process
Not every job needs to start from a rusted used unit. Conexwest delivers containers nationwide with an online ordering system that lets you specify paint, modifications, and delivery details in a few clicks, backed by a track record of more than 30,000 containers delivered across 48 states. Ordering a container built or refinished to spec removes the guesswork of assessing unknown paint history and hidden corrosion on a used box. For fleet buyers or anyone without the time for a multi-day prep job, that’s often a faster route to a durable finish than reviving a heavily weathered unit.
Are There Eco-Friendly Paint Options for Containers?
Solvent-based epoxy and urethane systems have long dominated container painting because they perform well, but they also carry high VOC content that matters in enclosed yards or areas with air-quality restrictions. Waterborne DTM formulations have narrowed that gap considerably. They’re now formulated to meet C3 through C5 corrosion protection classes under ISO 12944, the same standard used for demanding industrial and marine environments, while emitting fewer volatile compounds during application.
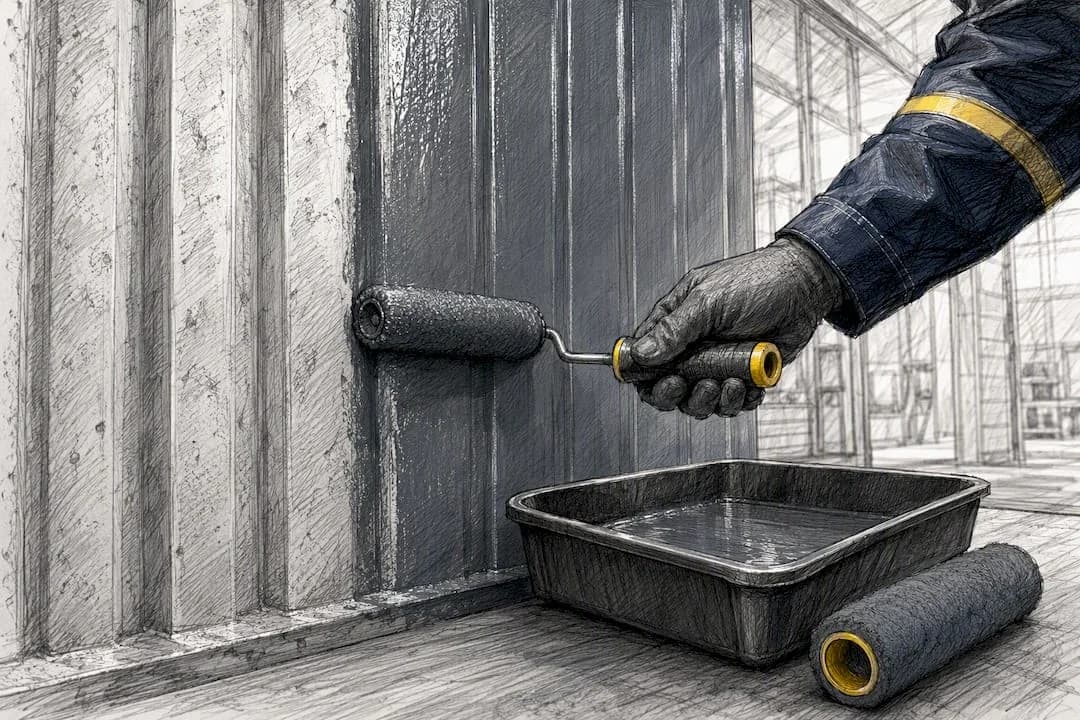
Lower VOC content isn’t just a compliance checkbox. It usually means less aggressive ventilation requirements, a smaller window for off-gassing before a container returns to service, and less exposure risk for anyone applying paint by hand rather than in a spray booth. Waterborne systems also tend to clean up with water rather than solvent, which simplifies equipment maintenance and reduces hazardous waste from brush and roller cleaning.
The trade-off worth knowing: waterborne primers can be more sensitive to application temperature and humidity than their solvent-based counterparts, so cure windows may stretch longer in cold or damp conditions. For most inland, general-purpose container painting, that trade-off is worth it. For extreme coastal or chemically aggressive sites, a specified epoxy or zinc-rich system still gives the widest margin of protection, waterborne or not.
What Mistakes Ruin a Container Paint Job?
Most container paint failures trace back to a handful of repeatable mistakes, not bad luck.
Painting over rust instead of removing it tops the list. A coat of primer doesn’t stop active corrosion; it just hides it until the paint blisters from underneath a few months later.
Skipping the dew point check is a close second. Applying paint to steel that’s too close to ambient dew point traps moisture in the film, and that shows up later as bubbling that no one can explain because the paint “looked fine” going on.
Using one heavy coat instead of two or three thin ones causes sagging, uneven film thickness, and weak spots that fail years before the rest of the surface. Mismatching primer and topcoat chemistry — say, an oil-based topcoat over a waterborne primer that isn’t rated for it — can cause peeling within a season; the product data sheet exists specifically to prevent this, and skipping it is a false economy.
Finally, underestimating cure time before returning a container to service or stacking cargo against fresh paint scuffs a finish that would otherwise have lasted a decade. Patience during the first week after painting protects the investment made in every prior step.
Why Longevity Should Drive Every Decision Here
Most container painting guides treat the topcoat color as the headline decision. That’s backwards. The color is the last choice you make, and arguably the least consequential one for how long the finish survives.
What actually determines service life is whether you treated painting as corrosion engineering or as a cosmetic weekend project. Owners consistently underinvest in primer quality and surface prep, then wonder why a $2,000 paint job needs redoing in three years instead of ten. The gap between a mediocre result and a genuinely durable one usually comes down to two decisions made before a single coat goes on: how thoroughly you removed the old rust, and whether the primer you chose actually matches the container’s exposure.
If you take one thing from this guide, take this: spend your budget on prep and primer first, topcoat second, and color last. A container with a mediocre topcoat over excellent prep will outlast a beautiful topcoat over rushed prep, every time. Readers weighing DIY against professional refurbishment should let the container’s condition, not their comfort with a paint sprayer, make that call.
— Conexwest
Get a Container Ready to Paint, or Skip the Prep Entirely
If reading through pressure-washing specs, rust converters, and cure windows has you leaning toward starting with a clean container instead, that’s a reasonable call. Conexwest sells and rents new and refurbished containers with an online ordering system that lets you customize paint, modifications, and delivery specs before the unit ever reaches your site, cutting out the guesswork of unknown paint history entirely.
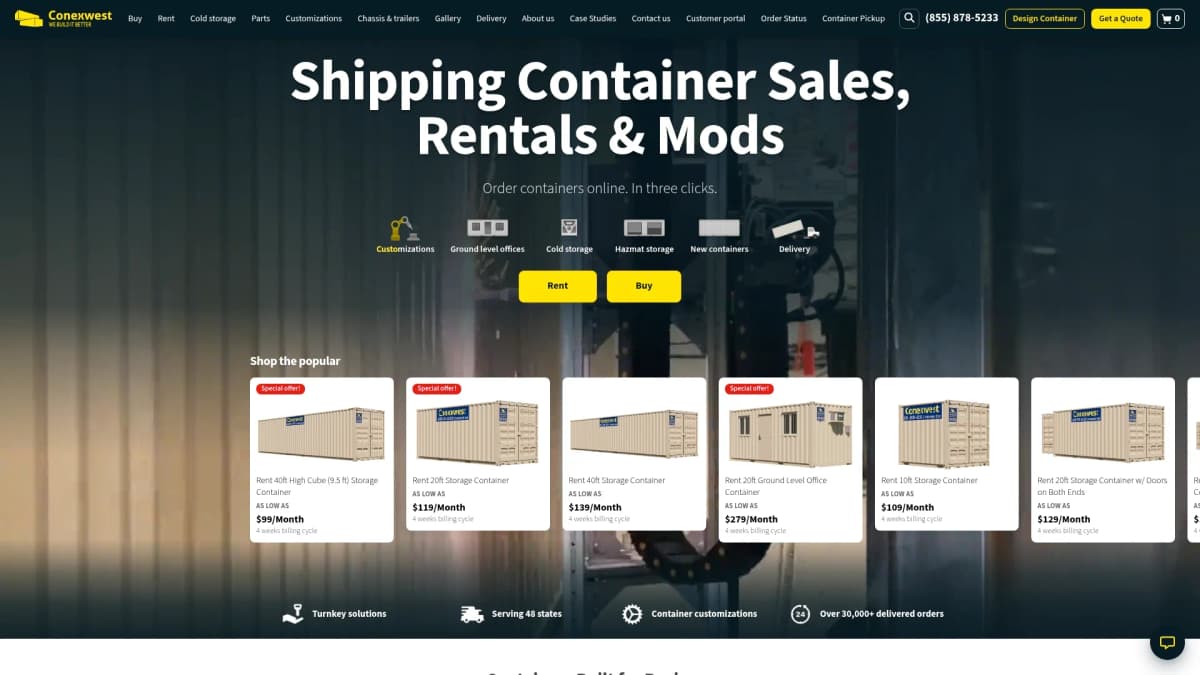
That matters most for fleet buyers, contractors on a deadline, or anyone who would rather spend a weekend on the job site than on rust remediation. With delivery experience across 48 states and more than 30,000 containers shipped, Conexwest can get a properly prepped shell to your location on a schedule you control. Browse the current inventory and customization options on the Conexwest container page to see what a ready-to-finish or fully custom-painted unit would cost for your project.
Sources
- Ultimate Guide to Painting Shipping Containers - Container Pricer
- Cost to Paint a Shipping Container: Price Guide 2026 – Design Transition Studio
- KINAcoatings product and formulation overview
FAQ
What kind of paint should I use on a shipping container?
Use an epoxy or zinc-rich primer on bare steel for corrosion resistance, then a polyurethane topcoat for UV protection in coastal or high-sun environments; acrylic or DTM waterborne systems work for inland, lower-exposure storage units.
How much does it cost to paint a 40-foot shipping container?
Total costs typically run $1,800 to $5,500 for a 40-foot container, with the range driven mainly by how much rust repair is needed and whether you choose a budget or marine-grade coating system.
Is it okay to paint a shipping container?
Yes, painting is one of the most effective ways to extend a container’s service life, provided you treat it as a corrosion-control system with proper prep, primer, and topcoat rather than a single cosmetic coat.
How many gallons of paint do I need for a 40-foot shipping container?
Plan for roughly 40 liters total across multiple coats on a 40-foot container, then confirm the exact figure against your chosen paint’s product data sheet since coverage varies by surface texture.