

How to Build a Shipping Container Home Step by Step
You’ve weighed the pros and cons and decided to build a shipping container home. The next question is what comes next. While container homes may look simple at first glance, the building process requires real construction planning, coordination, and regulatory compliance. This step-by-step guide is designed to help you plan your project by outlining what you need to know before building a container home that’s functional, compliant, and built to last.
Step 1: Plan the Purpose and Size of Your Shipping Container Home
The first step in planning your shipping container home is defining what you are building and how you want it to be used. This will determine and impact design, cost, permits and construction requirements.
Start by clarifying the intended use of the container home, some examples might include, but are not limited to:
- Primary residence
- Accessory dwelling unit (ADU)
- Guesthouse or backyard unit
- Cabin or secondary structure
- Vacation home
- Rental unit
- Office space
- Temporary housing
- Off-grid or rural housing solution
Next, define the size and layout of your container home. This step determines how the space will function and how many containers you’ll need.
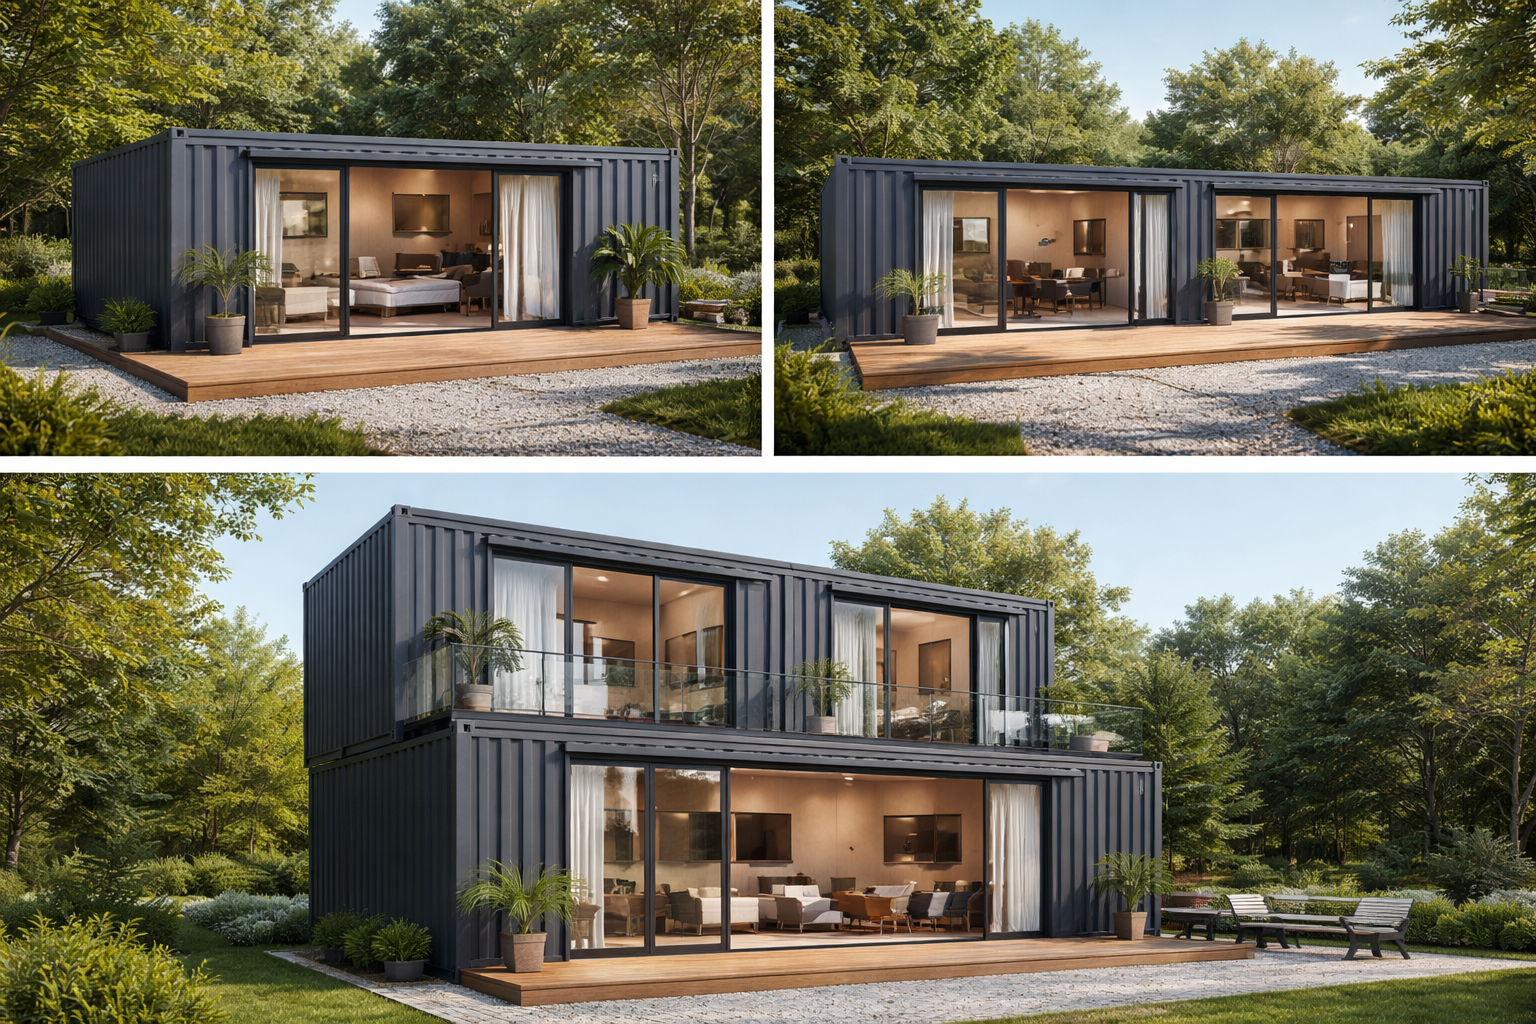
Most residential container homes are built using 20 feet or 40 feet shipping containers, either on their own or combined into larger configurations.
- 20ft containers are commonly used for compact studios, small ADUs, or single-room layouts. They work well for efficient designs where space is limited or where a minimal footprint is preferred.
- 40ft containers are the most popular choice for full residential layouts, offering more interior space and flexibility for bedrooms, kitchens, and living areas.
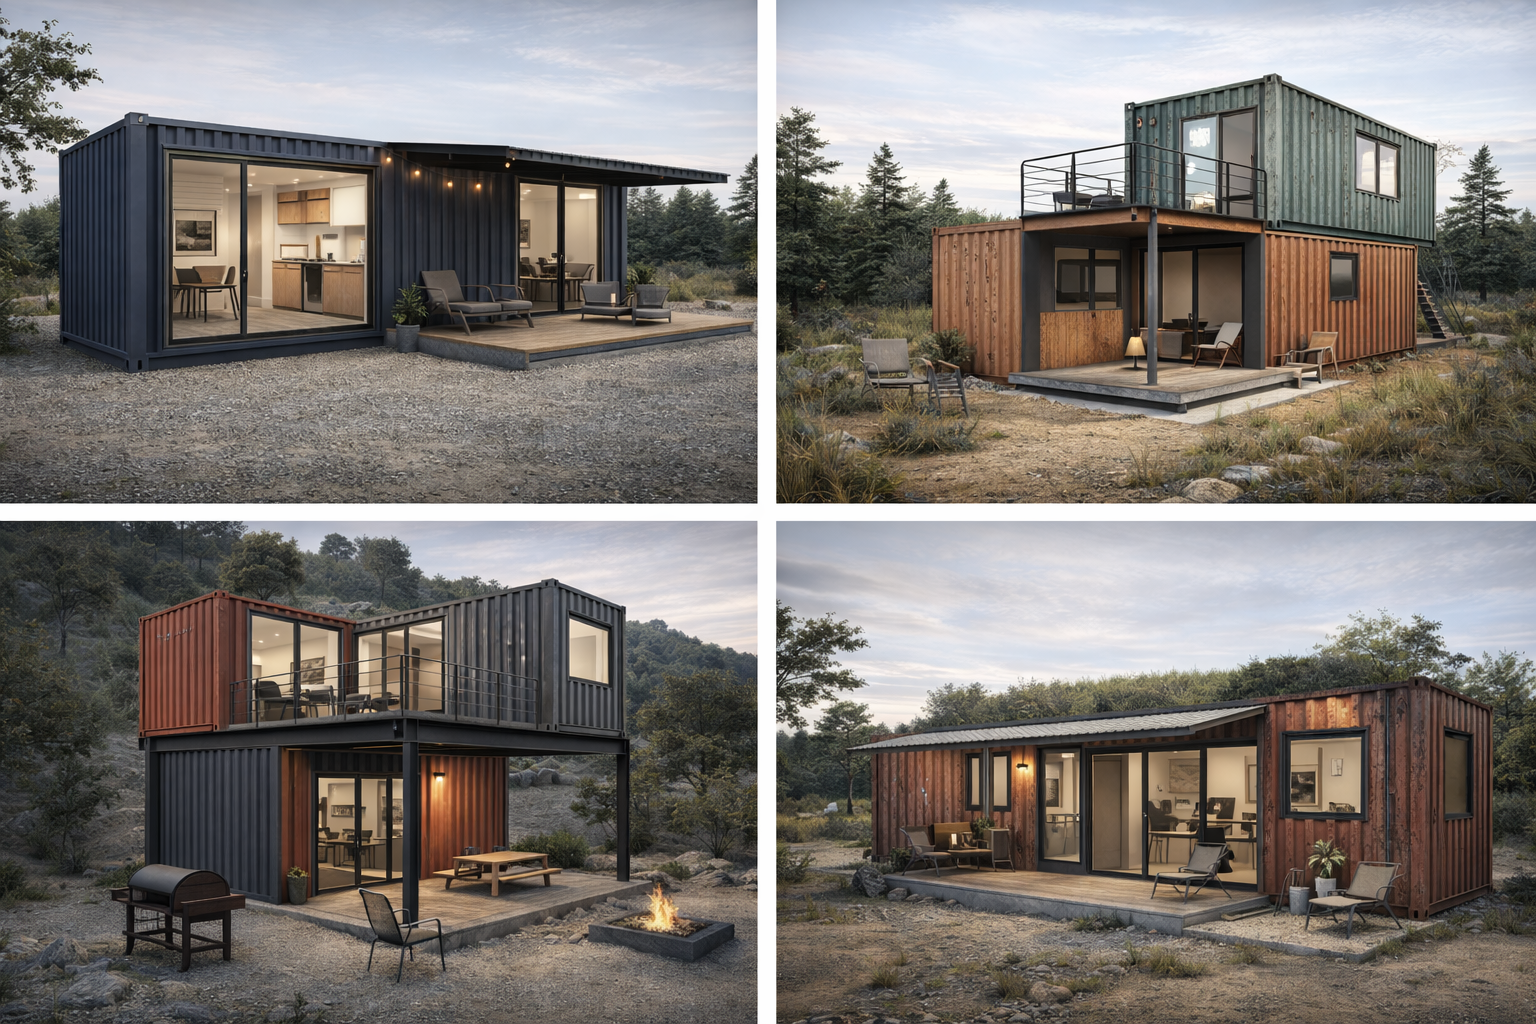
These containers can be arranged in several ways:
- Single-container layouts for smaller homes
- Side-by-side configurations containers can be conjoined to create a wider interior space.
- Stacked containers for multi-story designs
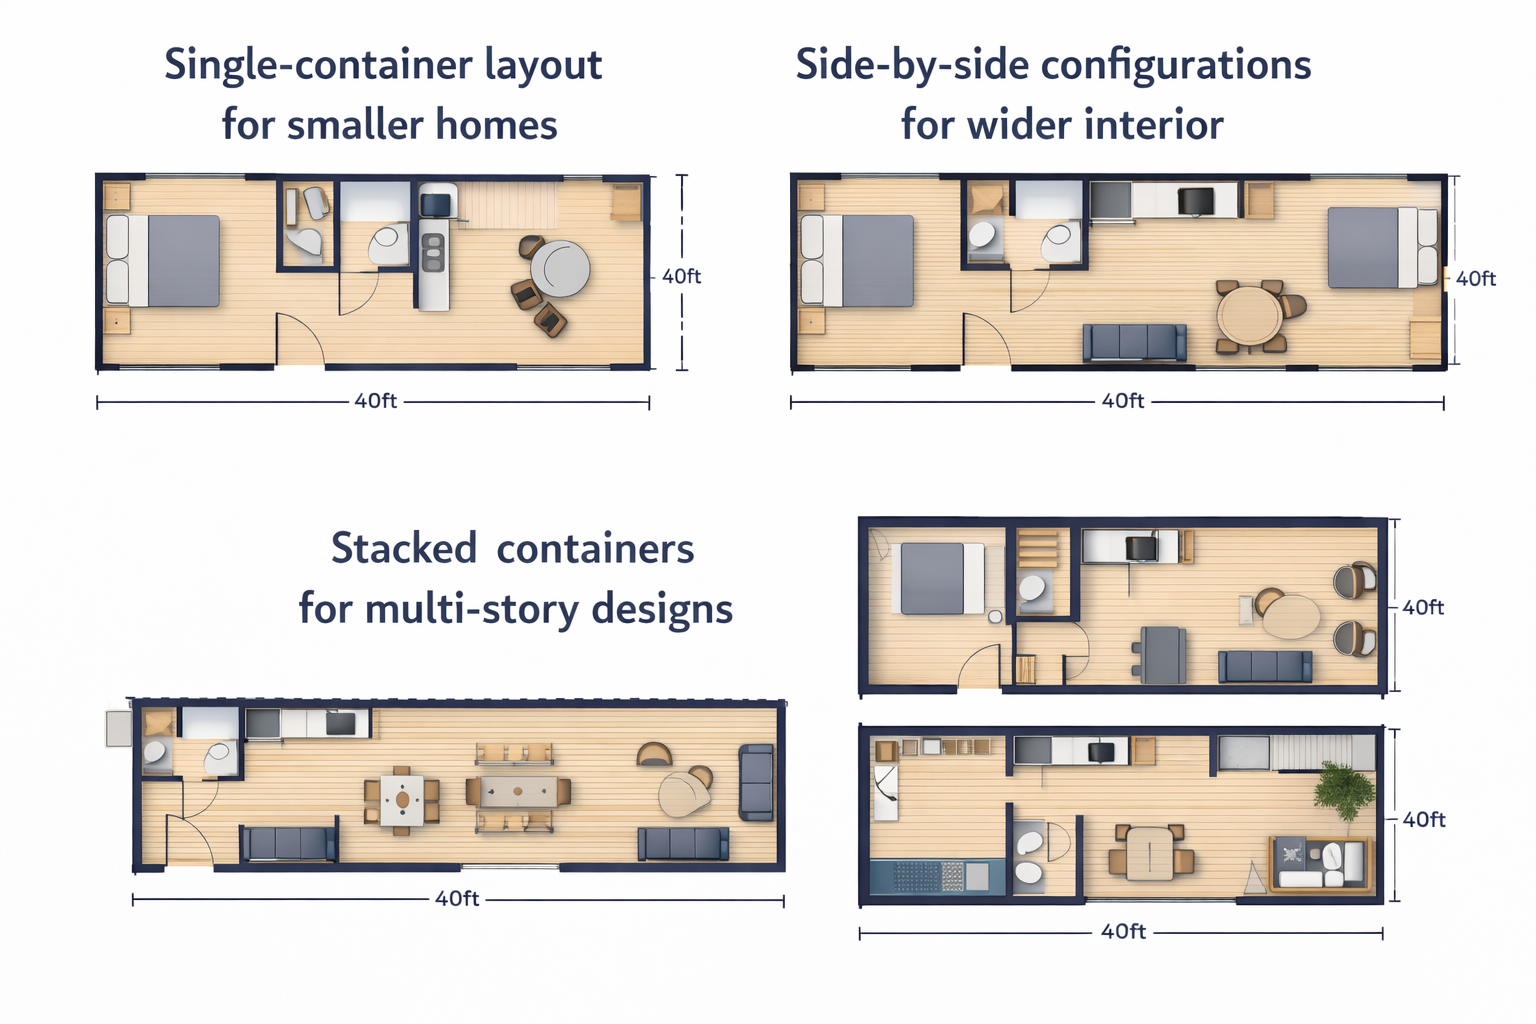
At this stage, it’s also important to consider overall square footage, room count, and ceiling height. Many homeowners choose high-cube containers to gain additional vertical space, which can significantly improve comfort and layout options in a residential build.
Step 2: Check Zoning and Permitting Early

Before you buy anything, confirm whether your jurisdiction allows container-based residential structures and under what conditions.
What to check:
- Zoning classification (residential, mixed-use, rural, ADU rules)
- Setbacks, height limits, lot coverage
- Foundation requirements
- Whether the container can be used as a permanent dwelling
- Any design/appearance restrictions
Most states and local governments adhere to the building codes published by the International Code Council (ICC). While these codes do not prohibit shipping container homes, they mandate that any residential structure meet established standards for structural safety, insulation, fire protection, energy efficiency, plumbing, and electrical systems. Consequently, container homes, like traditional houses, must be modified and engineered to ensure compliance with these requirements.
Local ordinances enforced by cities and counties, separate from standard zoning and building codes, can heavily influence shipping container homes. These local rules, often found in municipal code databases like Municode or American Legal Publishing, detail things like design standards, aesthetic requirements, how long a container can be placed on a site, and limitations on unconventional construction. Because these regulations differ significantly from one area to another, they are a key factor in determining if a container home will be permitted in a given spot.
Step 3: Choose the Right Container Type and Size
Most shipping container homes are built using 20ft or 40ft containers, as these sizes are widely available, easier to transport, and well-suited for residential layouts. If interior ceiling height is a priority, high-cube containers are often recommended, as they provide additional vertical clearance compared to standard units.
General sizing guidance:
- 20ft containers work well for compact studios, small offices, or ADUs where space efficiency is the goal.
- 40ft containers are more suitable for one-bedroom layouts or designs that combine living, kitchen, and sleeping zones within a single unit.
- Multiple-container builds are typically used for full residential homes that require separate rooms, larger footprints, or multi-story layouts.
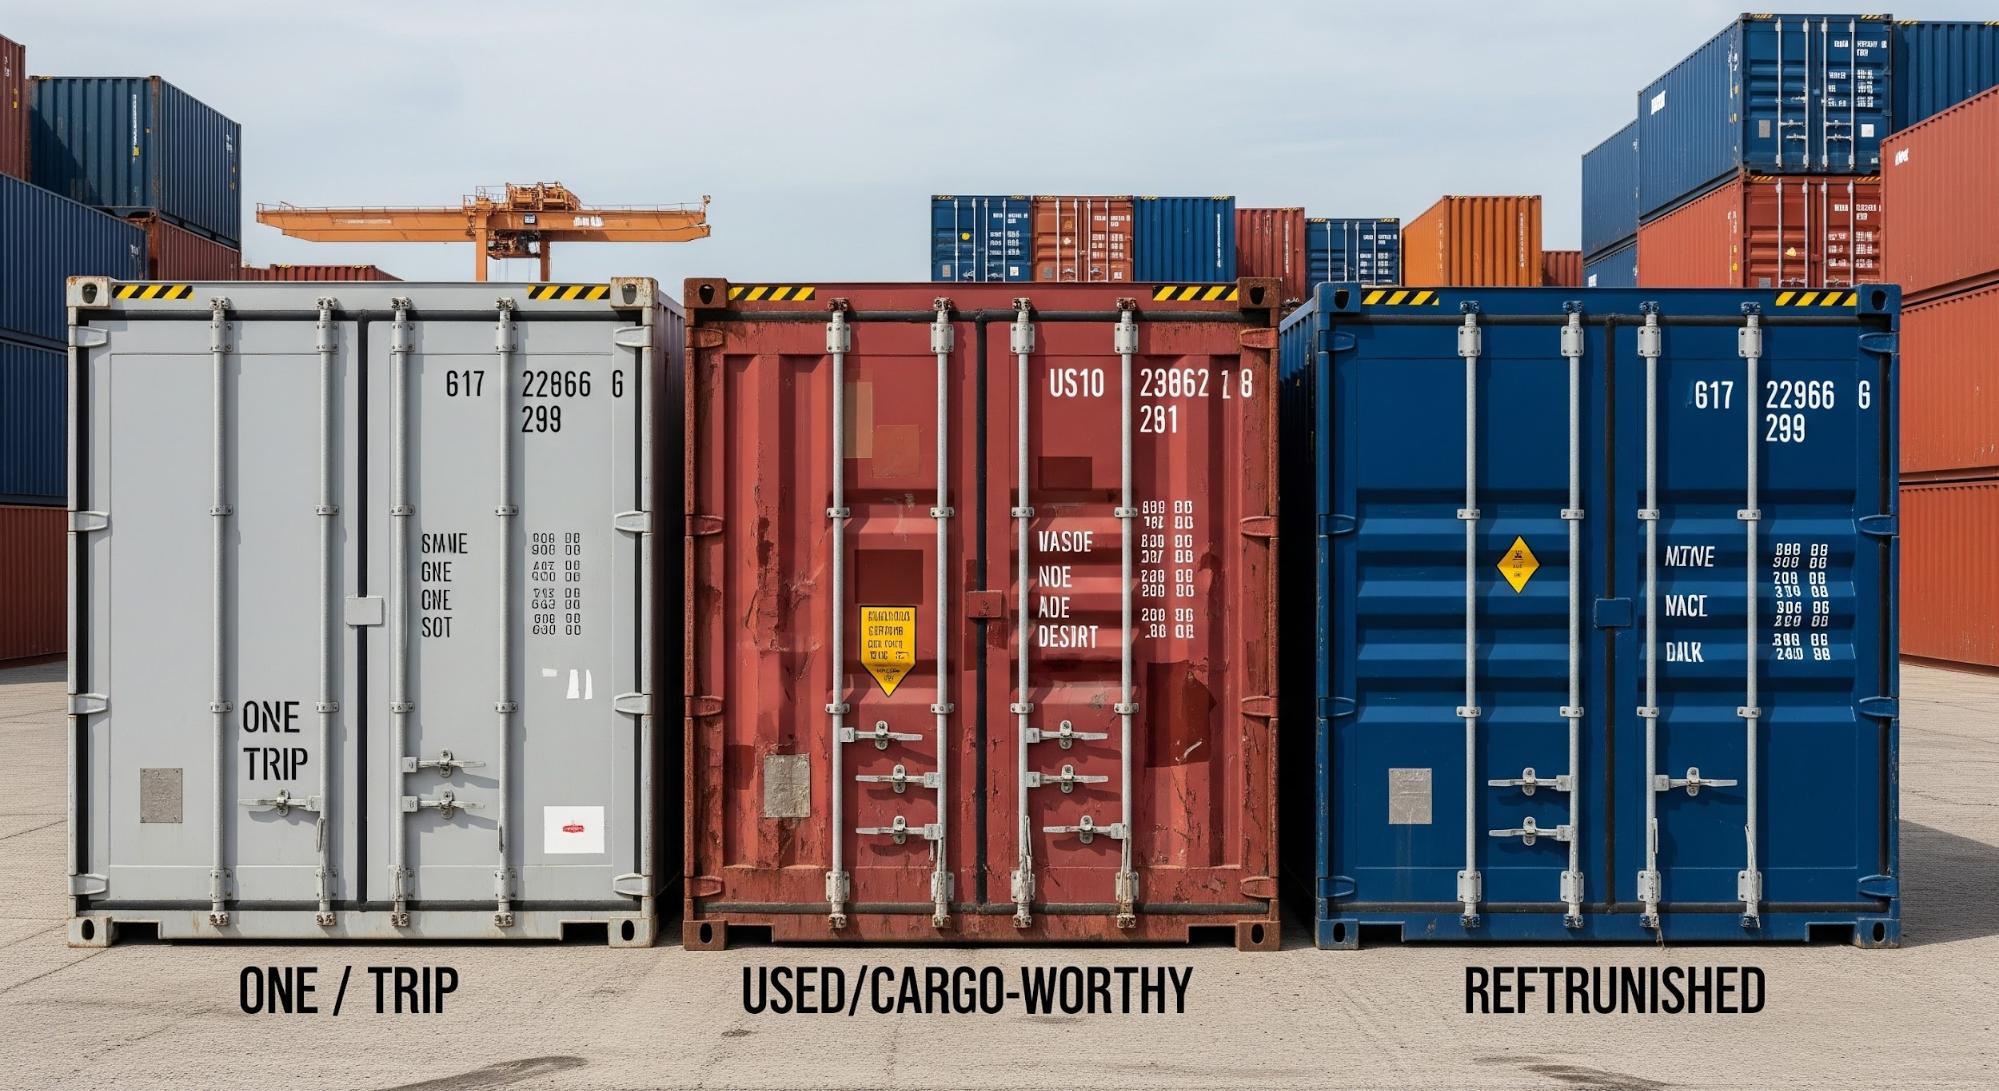
Beyond size, it’s also important to choose the right container condition, as this affects cost, appearance, and the amount of modification required.
Common container conditions include:
- New or One-Trip containers: These have minimal wear, require fewer repairs, and are often preferred when interior or exterior finishes will remain visible.
- Used Cargo Worthy containers: A more budget-friendly option that may show cosmetic wear and require additional preparation before finishing.
- Refurbished containers: Professionally improved for appearance and functionality while remaining cost-effective for residential projects.
Selecting the right container size and condition early helps balance budget, design goals, and long-term performance, making later construction steps more predictable and efficient.
Step 4: Design the Layout (Before You Cut Steel)
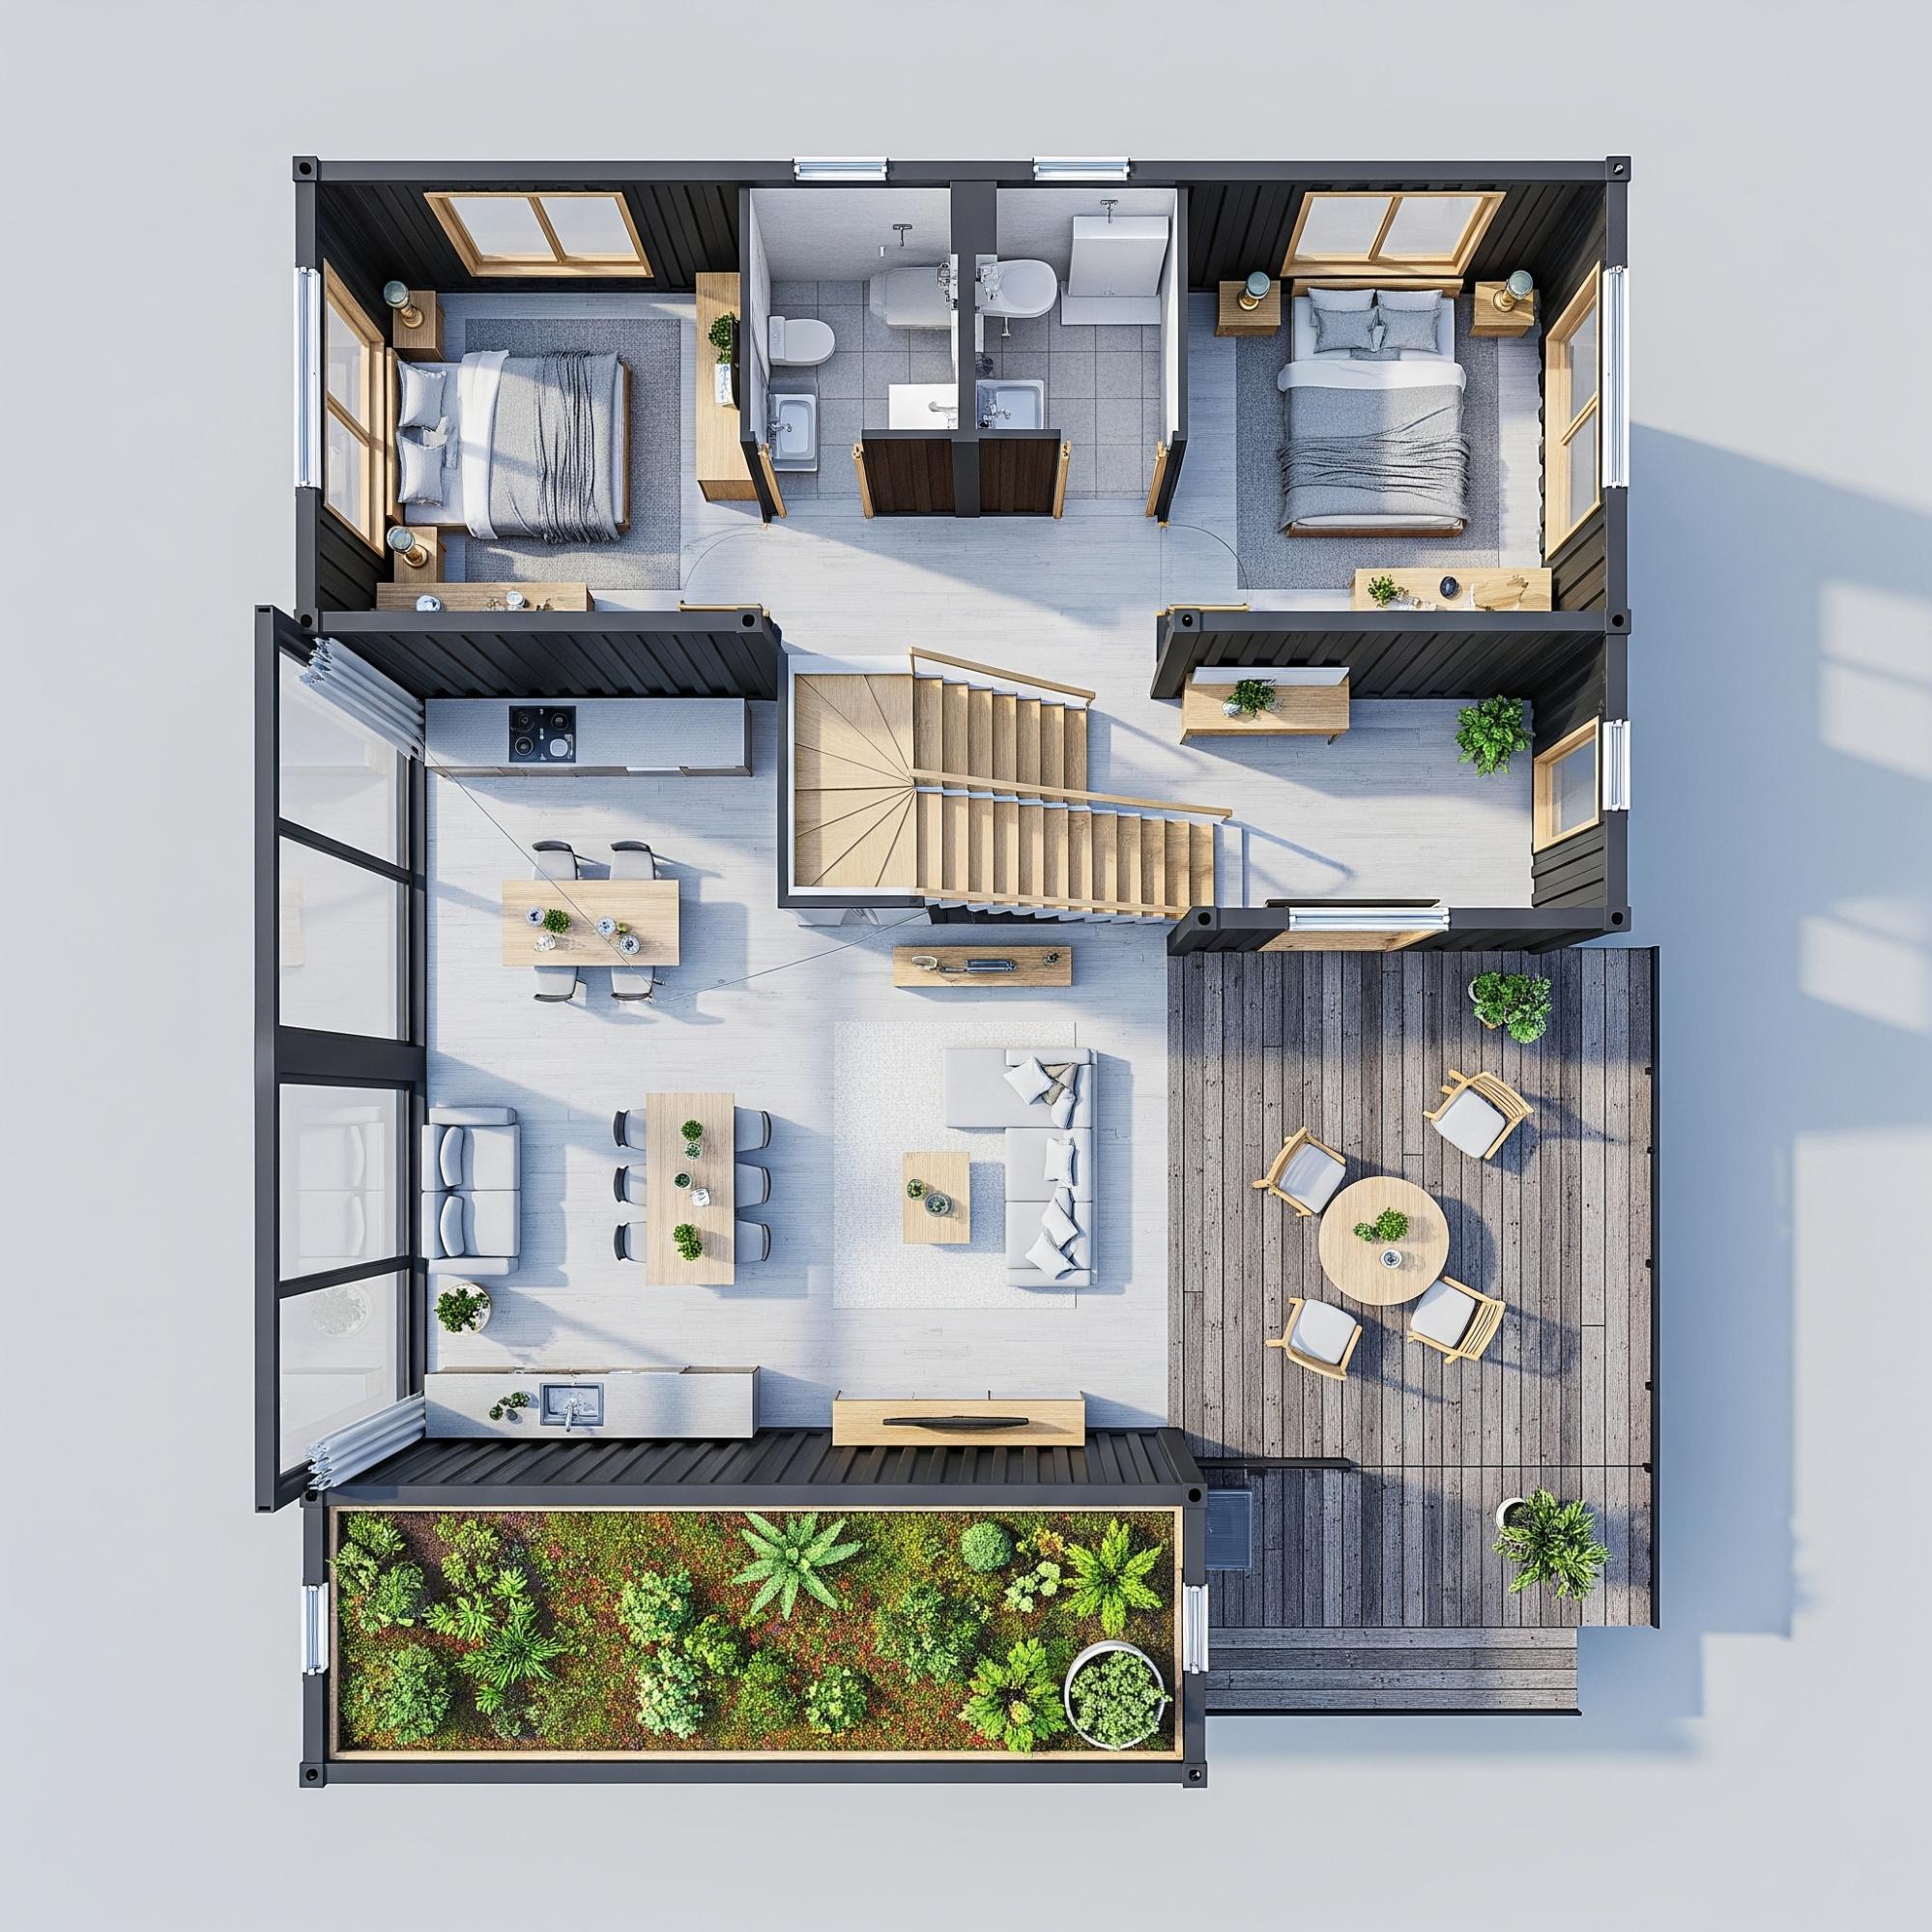
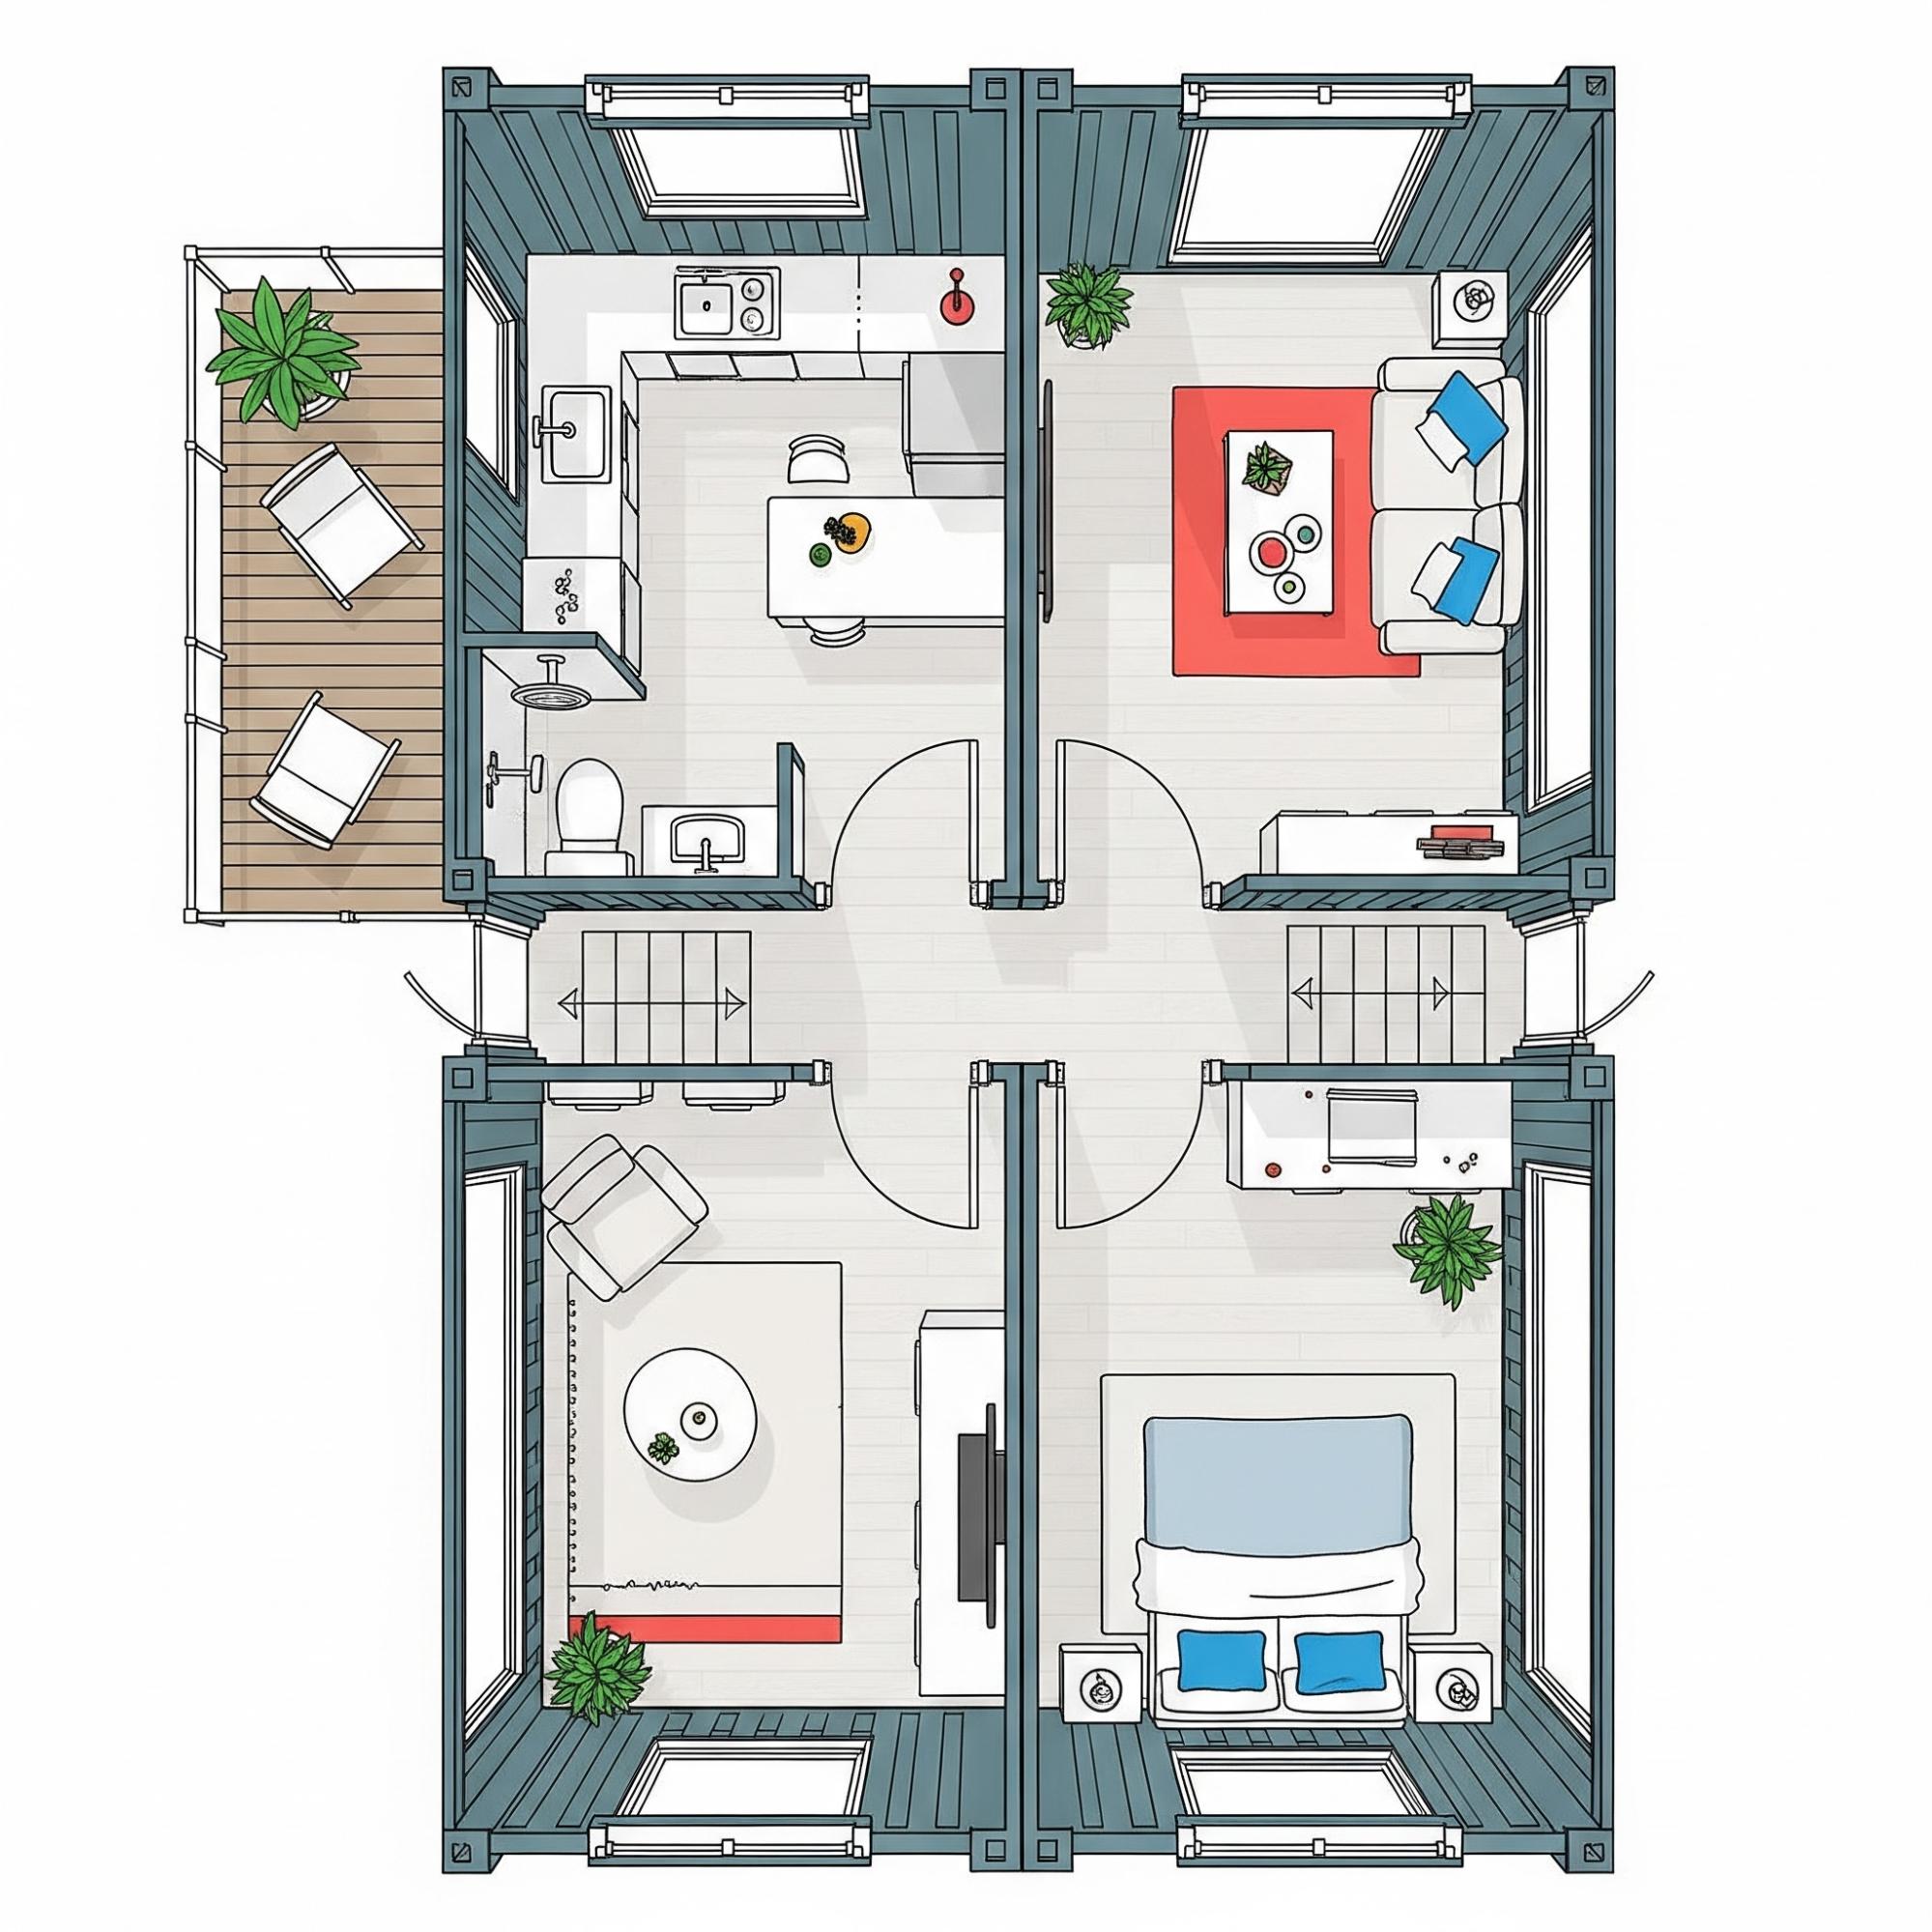
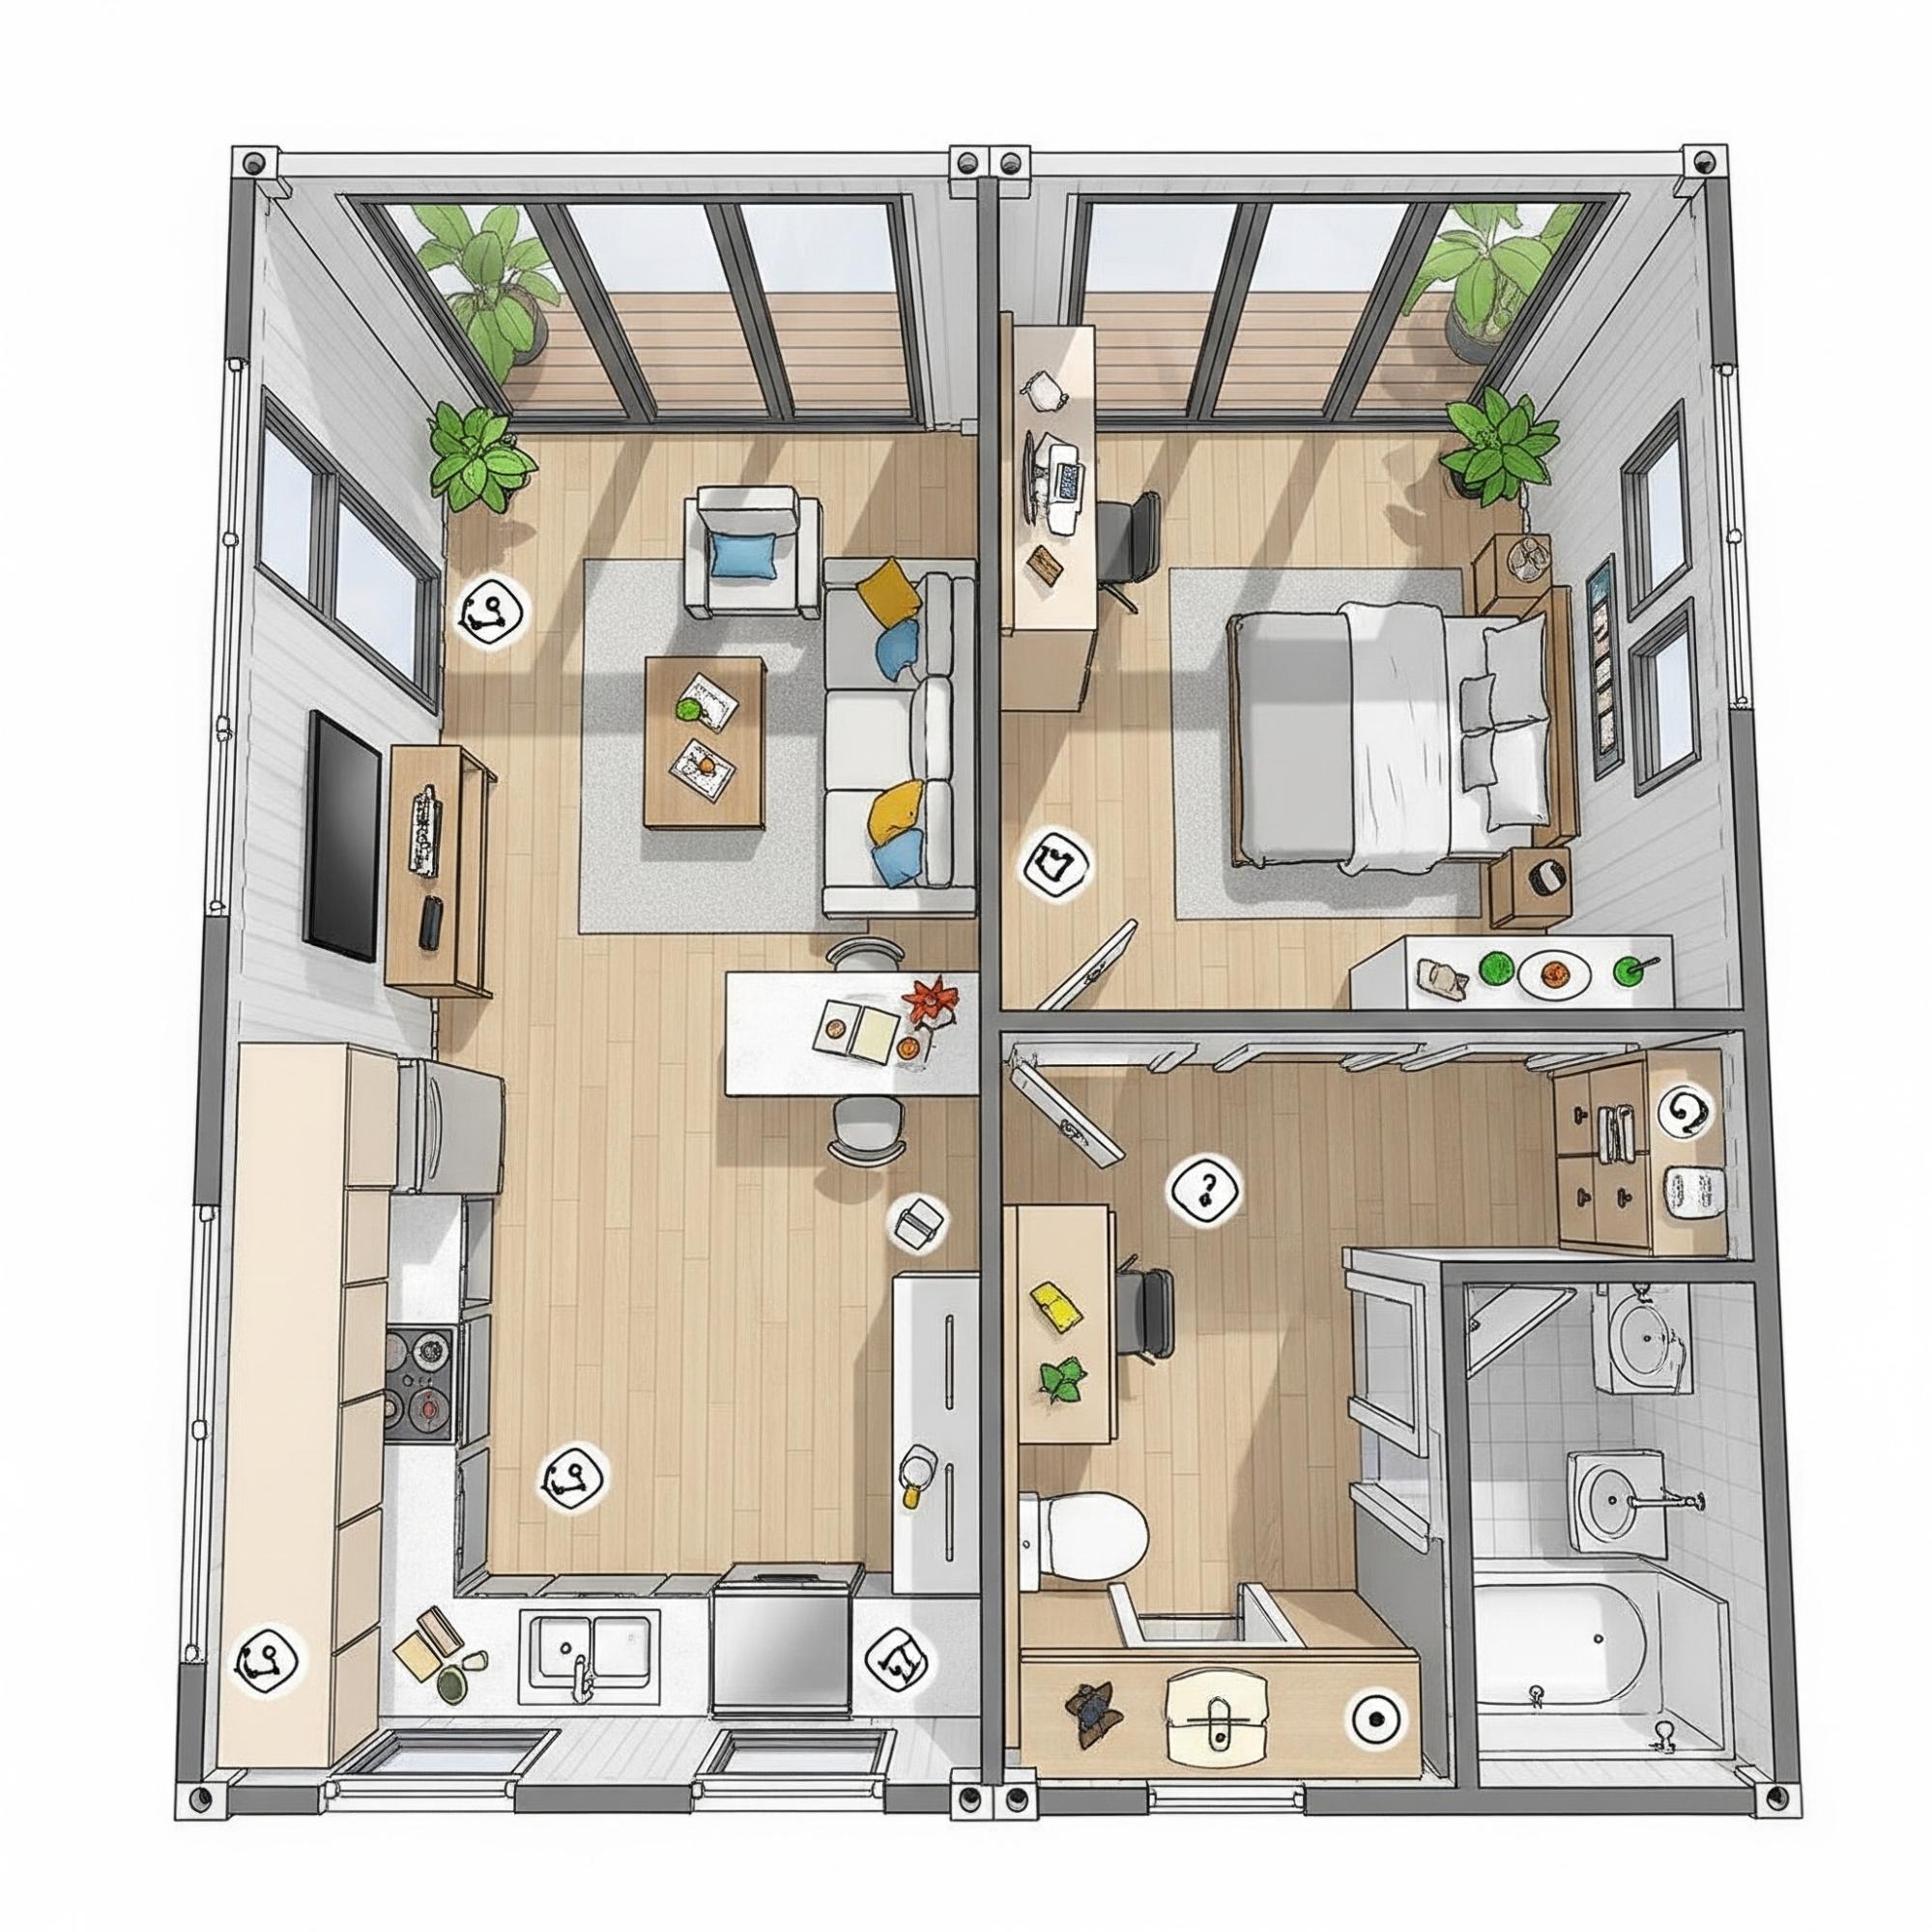
Your layout should be finalized before major modifications begin, as changing window or door placements later is one of the most common sources of cost overruns in shipping container home projects.
At this stage, planning should address both interior layout and structural requirements. Cutting openings in steel containers affects load-bearing walls and reinforcement needs, while layout decisions also influence foundation design, anchoring points, and code compliance.
Plan for:
- Window and door placement, circulation, and natural light
- Kitchen and bathroom locations to minimize plumbing runs
- Mechanical space for HVAC systems and water heaters
- Electrical panel placement and service access
- Insulation thickness and interior wall build-up, which impacts room dimensions
- Foundation type and anchoring points, especially for stacked or multi-container builds
- Building code requirements, including ceiling heights, egress, and minimum room sizes
If you’re working with a container supplier that offers a visual planning tool, this is where it becomes especially valuable. Seeing the layout before committing helps identify structural conflicts early and reduces costly revisions later in the build process.
Step 5: Prepare the Site and Foundation
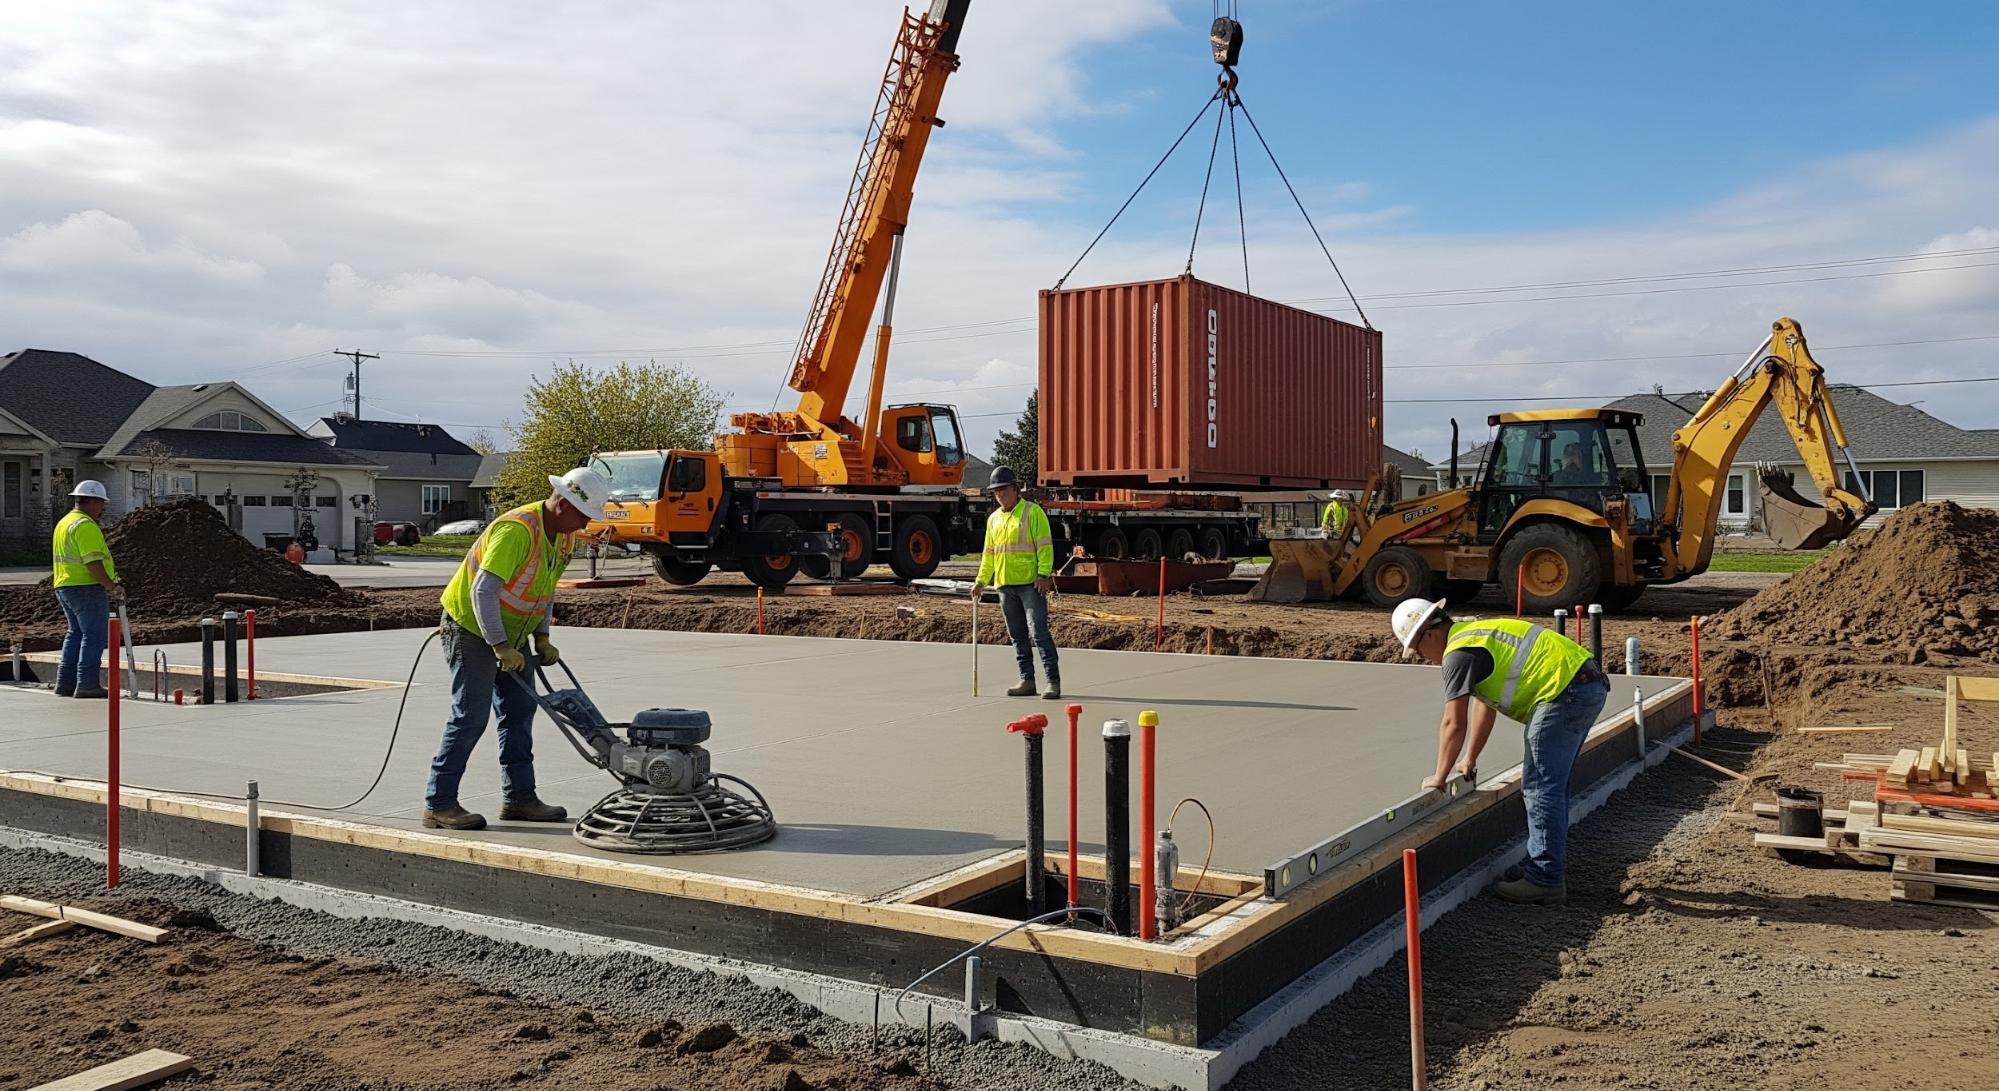
Shipping container homes still require proper site preparation and foundation work, just like traditional construction. This phase is critical to structural stability, code compliance, and long-term performance.
Typical site preparation includes:
- Grading and drainage planning to manage water runoff and soil stability
- Foundation selection, commonly a concrete slab, pier system, or engineered supports
- Utility stub-outs for water, sewer, and electrical service, when applicable
- Delivery access planning, including turn radius, overhead clearance, and crane or forklift requirements
Site work is often one of the most underestimated cost drivers in container home projects, particularly on hillside properties, remote locations, or tight urban lots. Addressing access and foundation requirements early helps avoid delays, redesigns, and unexpected expenses during installation.
Step 6: Structural Modifications and Reinforcement
This stage transforms a shipping container into a functional "container home."
Key structural modifications typically include:
- Cutting openings for doors and windows.
- Reinforcing these cut areas to maintain the container's structural integrity.
- Adding framed sections when joining multiple containers.
- Making optional roof modifications for rain management, solar panel installation, or aesthetic purposes.
It is important to note that the extent of engineering required increases proportionally with the number of openings cut and the number of containers combined.
Step 7: Insulation, Ventilation, and Climate Control
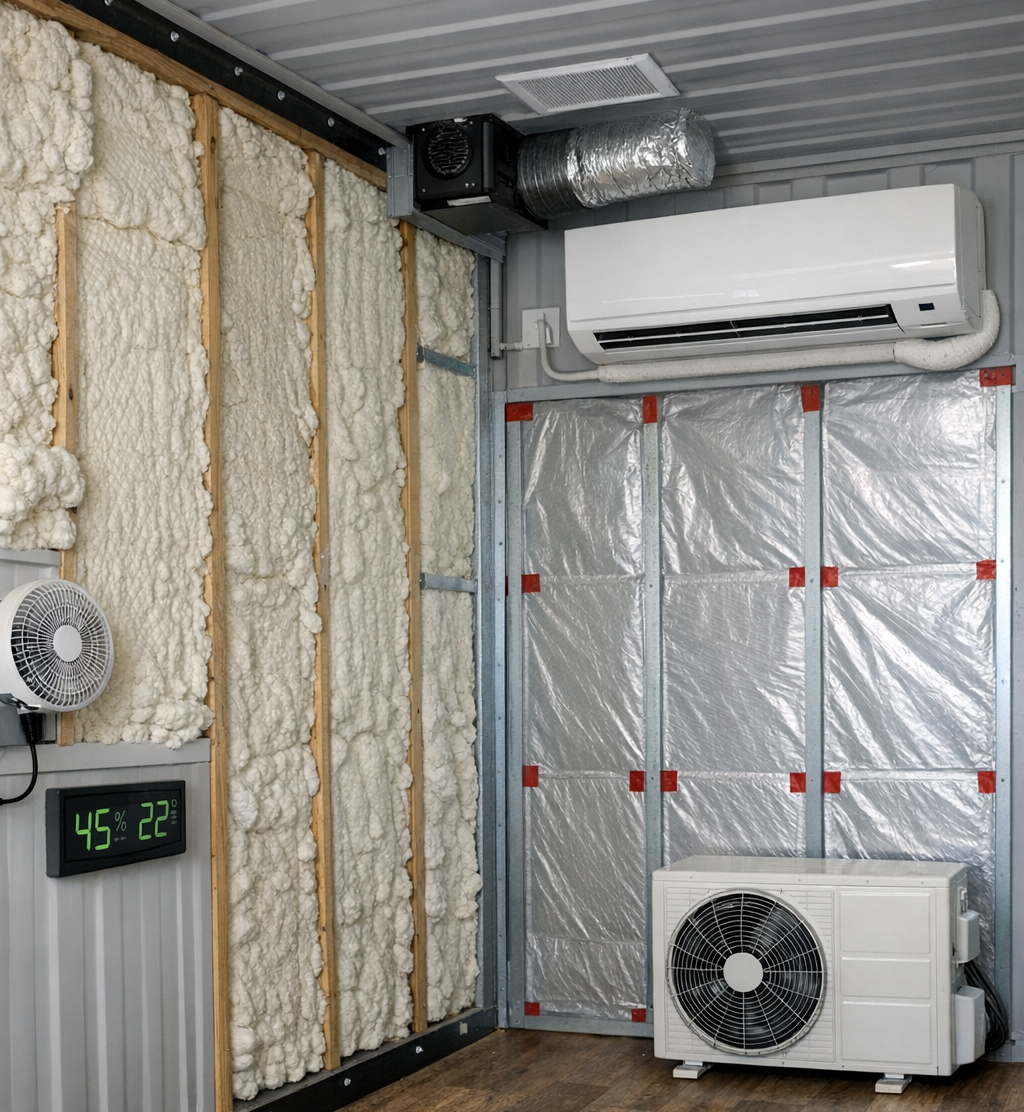
Steel is an excellent conductor of heat and cold, making proper insulation and climate control essential for comfort and energy efficiency.
Key elements include:
- Insulation Strategy: Choosing the right material (e.g., spray foam, rigid panels) for your climate.
- Vapor Control: Critical for preventing moisture damage and mold in most climates.
- Ventilation Plan: Ensuring fresh air circulation and managing interior moisture levels.
- HVAC Choice: Mini-split systems are a common and effective choice for container homes.
Neglecting this step is the primary reason container homes become uncomfortable and costly to operate.
Step 8: Electrical, Plumbing, and Interior Build-Out
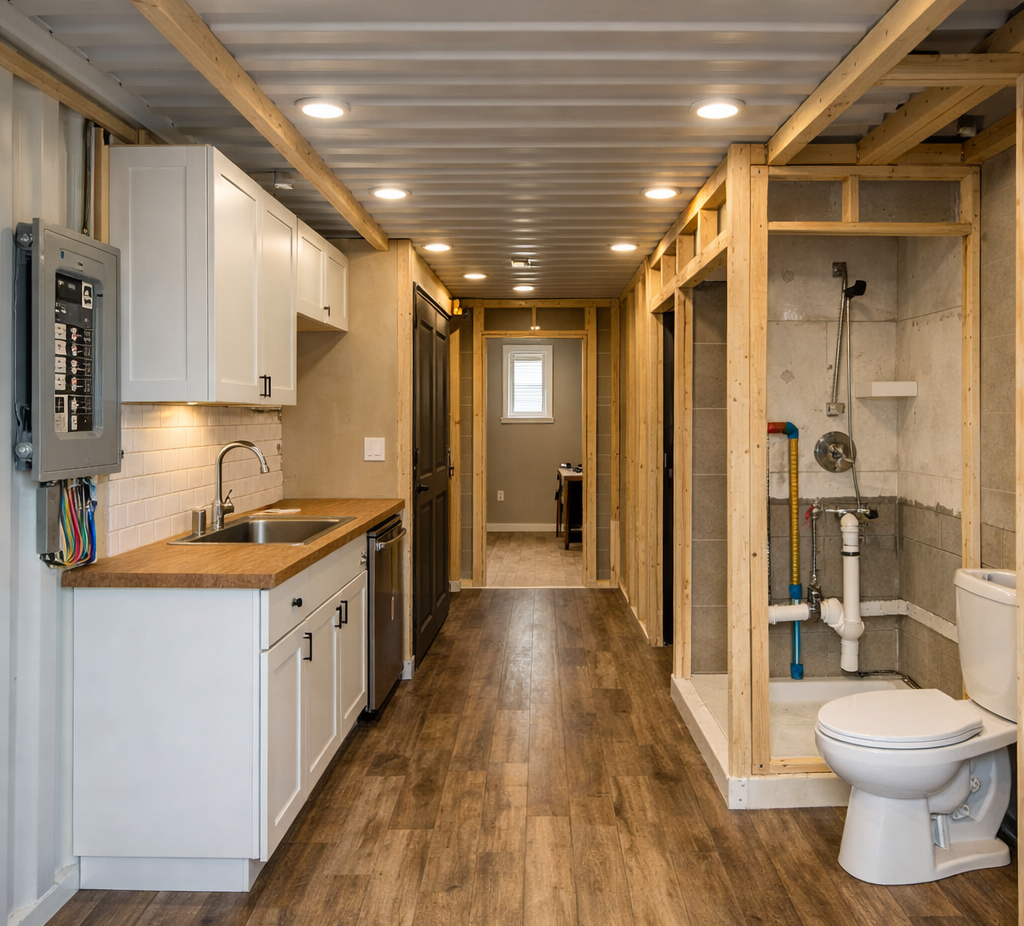
This phase resembles traditional construction:
- Electrical: Installation of the panel, circuits, lighting, and outlets.
- Plumbing: Rough-in for supply and waste lines.
- Structure/Enclosure: Framing of interior walls and ceilings, and installation of moisture-resistant surfaces where required.
- Finishing: Installation of flooring, cabinetry, fixtures, and all interior finishes.
At this stage, the shipping container serves as the shell, and the interior construction transforms it into a functional home.
Step 9: Delivery and Placement
Once the container unit is ready (or after the bare container arrives), it is delivered and set up.
Key considerations for this stage include:
- Delivery method (tilt-bed, chassis, or crane)
- Site access requirements
- Achieving level placement and securing the unit to its foundation
- Weather conditions (specifically, wind conditions are critical for crane lifts)
Following placement, the process typically concludes with final hookups and exterior connections.
Step 10: Inspections, Final Approvals, and Move-In
Most jurisdictions require inspections similar to traditional homes:
- Foundation and anchoring
- Electrical and plumbing
- Structural compliance (if required)
- Energy/insulation compliance
- Final occupancy approval
Your timeline depends heavily on local inspection scheduling.
DIY vs. Turnkey: Understanding the Practical Difference
- DIY (Do-It-Yourself) is the best fit if you already have a robust contractor network and are prepared to manage all aspects, including permitting, coordinating trades, and project sequencing.
- Turnkey is typically a faster and simpler solution, ideal if you prefer a single team to manage everything: container selection, modifications, and delivery coordination.
Regardless of your choice, the smoothest projects are always built on realistic planning and early confirmation of local zoning regulations.
Ready to Start Planning?
If you’re exploring a container-based build, begin with the fundamentals: choose the right container size and condition, define your layout, and confirm local zoning and permitting requirements before moving forward. These early decisions shape the cost, timeline, and feasibility of your project.
When you’re ready to take the next step, you can browse available containers and purchase online, or use Conexbuilder to visualize layouts and explore customization options before committing. Whether you’re planning independently or looking for additional guidance, starting with a clear structure helps turn a container concept into a build-ready plan.