
Logistics Pros: DIN Guide to Container Dehumidifiers for 2–3 Week Runs
For most containerized shipments, the lowest-risk approach is a correctly specified container desiccant, calcium chloride for long or humid routes rather than a powered dehumidifier. That’s because container “breathing” drives internal relative humidity far higher than ambient conditions, and passive desiccants handle that swing without power or moving parts. Powered systems are also used, mainly in controlled, on-site storage where cargo is accessed repeatedly. Either way, correct sizing and proper container prep come first.
TL;DR:
- Calcium chloride desiccants are more effective for long or humid routes due to their superior moisture absorption capacity, especially over transit times exceeding two weeks.
- Proper container preparation, including sealing vents, using kiln-dried pallets, and avoiding damp materials, significantly reduces the risk of moisture buildup that can overwhelm desiccants.
- Correct sizing of desiccants based on the DIN 55474 standard and adding a safety margin is crucial for preventing condensation and protecting sensitive cargo.
- Powered dehumidification systems are better suited for static storage or frequent access environments where precise RH control is necessary, despite higher costs and maintenance.
- Investing in containers with built-in humidity control features, such as sealed doors and vapor barriers, can prevent moisture issues that desiccants alone cannot mitigate.
Table of Contents
- How Dehumidifiers in Containers Compare: Silica Gel, Clay, and Calcium Chloride
- How to Size Container Desiccants the Right Way
- Container Prep Steps That Cut Moisture Risk Before Loading
- Placing and Monitoring Desiccants for Best Results
- When Powered Dehumidifiers Make More Sense Than Desiccants
- A Container Supplier’s View on Preventing Cargo Moisture Damage
- Get a Container Built for Your Humidity Control Needs
- Where to Go Deeper on Container Moisture Standards
- Sources
- FAQ
How Dehumidifiers in Containers Compare: Silica Gel, Clay, and Calcium Chloride
Every desiccant pulls moisture out of the air, but not the same way. Silica gel and clay work through adsorption, meaning water vapor clings to the surface of the material without changing its physical state. Calcium chloride works through absorption: it actually reacts with water vapor and converts to a liquid brine, which lets it hold far more moisture per kilogram than adsorption-based materials.
That mechanical difference determines where each one belongs.
- Silica gel and clay work best on short routes, in small packages, and where a visible color-changing indicator is useful for quick spot checks.
- Calcium chloride is the better fit for long ocean voyages, high ambient humidity, and cargo that can’t tolerate any condensation risk.
- Clay is the cheapest option per unit but has the lowest capacity, making it a poor match for anything beyond short domestic hauls.
The field evidence backs this up clearly. In one representative 32-day voyage, silica gel reached saturation within about 12 days, while calcium chloride kept working for the full transit and prevented measurable condensation at discharge. On routes crossing multiple climate zones, that gap between saturation on day 12 and full-voyage protection is the difference between a clean delivery and a cargo claim.
Statistic to remember: Calcium chloride stays effective across a working range of roughly 40% to 98% relative humidity, while silica gel performs best only in the 20% to 40% band and saturates quickly once humidity climbs above that.
Cargo categories that consistently justify the extra cost of calcium chloride include textiles, electronics, machinery parts prone to corrosion, packaged foods, and pharmaceuticals. If the cargo has any sensitivity to moisture and the transit runs longer than two to three weeks, silica gel is usually the wrong tool for the job.
How to Size Container Desiccants the Right Way
Guessing at desiccant quantity is how shipments fail. The DIN 55474 standard gives the industry a repeatable calculation built around four variables: container volume, humidity content per cubic meter, the weight of hygroscopic packaging materials in the load, and expected transit time.
A practical sizing workflow looks like this:
- Calculate total container volume and note the origin and destination climate zones.
- Estimate the hygroscopic load, meaning wood pallets, cardboard, and other materials that hold and release moisture.
- Apply the DIN 55474 formula, or a DIN-based calculator, to get a baseline desiccant unit count.
- Add a safety margin before finalizing the order.
That margin matters more than most shippers realize. Manufacturers recommend dimensioning calcium chloride with a safety margin above the rated “max” spec to account for packaging moisture, voyage delays, and real-world variability that a lab spec sheet doesn’t capture. A container rated for 10 kg of CaCl2 under ideal lab conditions should typically ship with closer to 15 kg.
Pro Tip: Keep a copy of your sizing calculation, desiccant certificates, and load photos with every shipment. If a moisture-related claim comes in, that paper trail is often the difference between a fast payout and a drawn-out dispute.
Container Prep Steps That Cut Moisture Risk Before Loading
Desiccants work harder than they need to when the container itself is the problem. A few upstream fixes reduce both risk and desiccant demand:
- Use kiln-dried pallets, or non-wood alternatives, and document moisture content at or below the level your desiccant sizing assumes.
- Seal container vents when shipping desiccant-protected dry cargo. Ventilation only helps in specific conditions, and the rule of thumb, “hot to cold, ventilate bold; cold to hot, ventilate not,” explains when opening vents helps versus when it backfires.
- Wrap high-value or moisture-sensitive items in vapor barrier film or shrink-wrap before loading, adding a second line of defense inside the container.
- Never load green or uncured wood, damp cardboard, or freshly painted crates. Even a modest amount of uncured material can overwhelm a properly sized desiccant load.
These steps cost little and prevent the most common cause of desiccant failure: a container that’s fighting a moisture source you loaded yourself.
Placing and Monitoring Desiccants for Best Results
Placement matters almost as much as desiccant chemistry. Bulk units belong near the doors and along the side walls where airflow is greatest, while in-box desiccants go directly inside sealed cartons holding sensitive goods. Secure every unit so it can’t shift and contact cargo directly during transit.
- Hang or strap desiccants to interior container walls rather than resting them loosely on the floor or against pallets.
- Use humidity data loggers to record RH readings throughout transit, and check color-indicator desiccants at any accessible checkpoint.
- On arrival, inspect for saturation, condensation on ceiling or walls, and any sign of brine leakage before unloading cargo.
- Photograph desiccant condition and any moisture damage immediately, since this evidence supports claims processing.
One detail worth knowing: quality calcium chloride pouches use gelling agents engineered to retain the liquid brine inside the pouch as the material deliquesces, so leakage is rare with correctly specified units. If a pouch does leak, handle it with gloves and avoid direct skin contact with the brine.
When Powered Dehumidifiers Make More Sense Than Desiccants
Active systems earn their keep in specific scenarios: long-term on-site storage, containers accessed frequently for inventory pulls, or situations demanding precise, continuous RH control that passive units can’t guarantee. Insurers and logistics guidance generally favor desiccants for transit precisely because they need no power and have no moving parts to fail.
- Refrigerant-based units offer strong moisture removal for larger static spaces but need reliable power and periodic maintenance.
- Thermoelectric units are quieter and lower maintenance but remove less moisture per hour, better suited to smaller enclosed volumes.
- Containerized mobile systems can add set-point control, remote monitoring, and ducting to serve multiple containers from one unit.
- The trade-off is real: higher upfront and operating cost, plus a mechanical failure mode that desiccants simply don’t have.
Many operations run both: desiccants for the transit leg, powered dehumidification once cargo reaches static storage.
A Container Supplier’s View on Preventing Cargo Moisture Damage
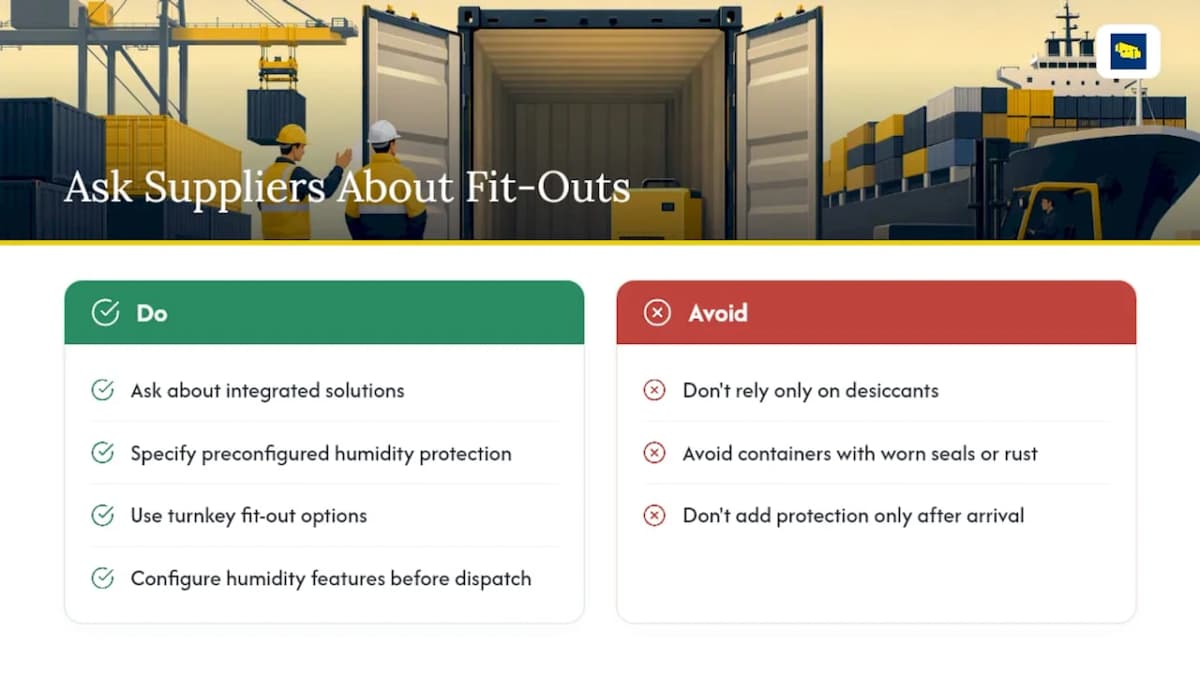
Desiccants and dehumidifiers only work as well as the container around them. A unit with worn door seals, rusted-through panels, or a compromised roof will let moisture in no matter how much calcium chloride sits inside. That’s why fit-out details, sealed doors, interior vapor barriers, fitted shelving that keeps cargo off the floor, matter as much as desiccant chemistry.
It’s worth asking a container supplier about integrated solutions before a problem shows up on arrival, particularly for retrofits or preconfigured humidity protection built into the container itself rather than added after the fact. Some container suppliers have delivered tens of thousands of containers across many states, with online customization tools and turnkey fit-out options that let buyers configure humidity-relevant features before the container leaves the yard.
— Conexwest
Get a Container Built for Your Humidity Control Needs
If your team keeps fighting condensation shipment after shipment, the container itself may be the weak link, not the desiccant math. Some companies sell and rent shipping containers with online customization tools that let customers configure retrofits like sealed doors, interior finishing, and fitted shelving before delivery, backed by nationwide shipping and a straightforward quoting process.
Request a custom fit-out if your cargo needs vapor barrier lining, needs to integrate with a powered dehumidification setup, or if you’re storing goods on a recurring basis and want a container built for the job from day one. Start by browsing container options and requesting a quote on the Conexwest container page to see what a properly configured unit can save you in claims and spoiled inventory.
Where to Go Deeper on Container Moisture Standards

For technical background beyond this guide, consult the UnitLoad Center white paper on sea container moisture, Absortech’s calcium chloride versus silica gel comparison, and Logis-Tech’s containerized system overview. DIN 55474 calculators and shipment logs make claims support far easier.
Sources
- Calcium chloride vs silica gel: which desiccant? | Absortech
- Moisture in Sea Containers (white paper) | UnitLoad Center, Virginia Tech
- Condensation inside shipping containers: Why it happens and how to prevent it - Cargo Intelligence
- Mobile Dehumidified Container Systems For In The Field Humidity Control • Logis-Tech, LLC
FAQ
What Are the Best Dehumidifiers for Storage Containers?
For transit and most storage, calcium chloride desiccants outperform silica gel and clay on long or humid routes because they absorb more moisture and last longer. For static on-site storage with frequent access, a powered refrigerant or thermoelectric unit gives more precise control.
Where Should You Not Place a Dehumidifier or Desiccant?
Never place a desiccant unit where it can contact cargo directly, since condensation or brine leakage can stain or damage goods on contact. Powered units should also avoid placement directly against container walls where airflow gets blocked, reducing their effective coverage.
What Is a Good Moisture Absorber for Containers?
Silica gel remains a good, lower-cost option for short routes and smaller enclosed packages.
Should I Choose a Custom Container to Reduce Moisture Problems?
A container with sealed doors, intact seals, and interior vapor barriers reduces moisture risk before any desiccant goes inside. Some suppliers offer customizable containers with these features built in, which is worth exploring if condensation damage is a recurring problem for your shipments.